

| |
| HOME |
| LITERATURE |
| TESTIMONIALS |
| FAQS |
| AVAILABILITY |
| CONTACT |
| TONGS: |
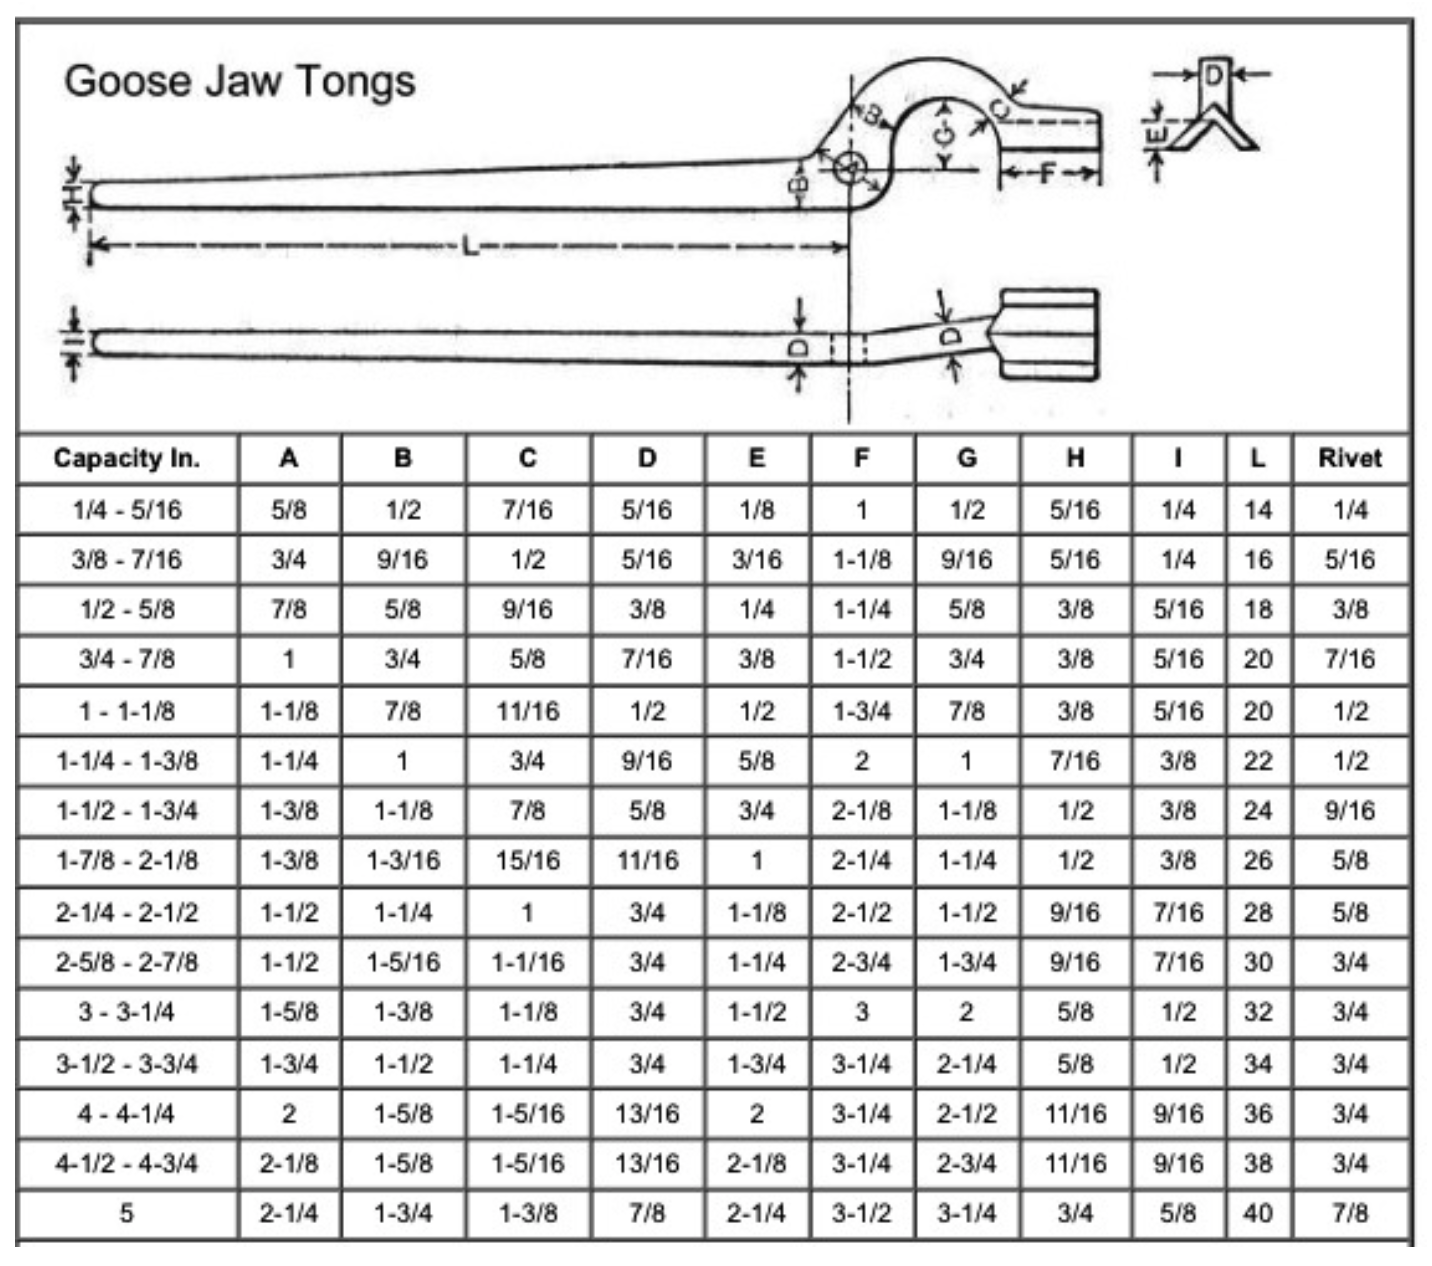
These tongs were the industry standard for many years, and with only a slight variation, in the name of simplicity in manufacturing, still are. It’s the artist blacksmiths who have forgotten how to make good tongs.
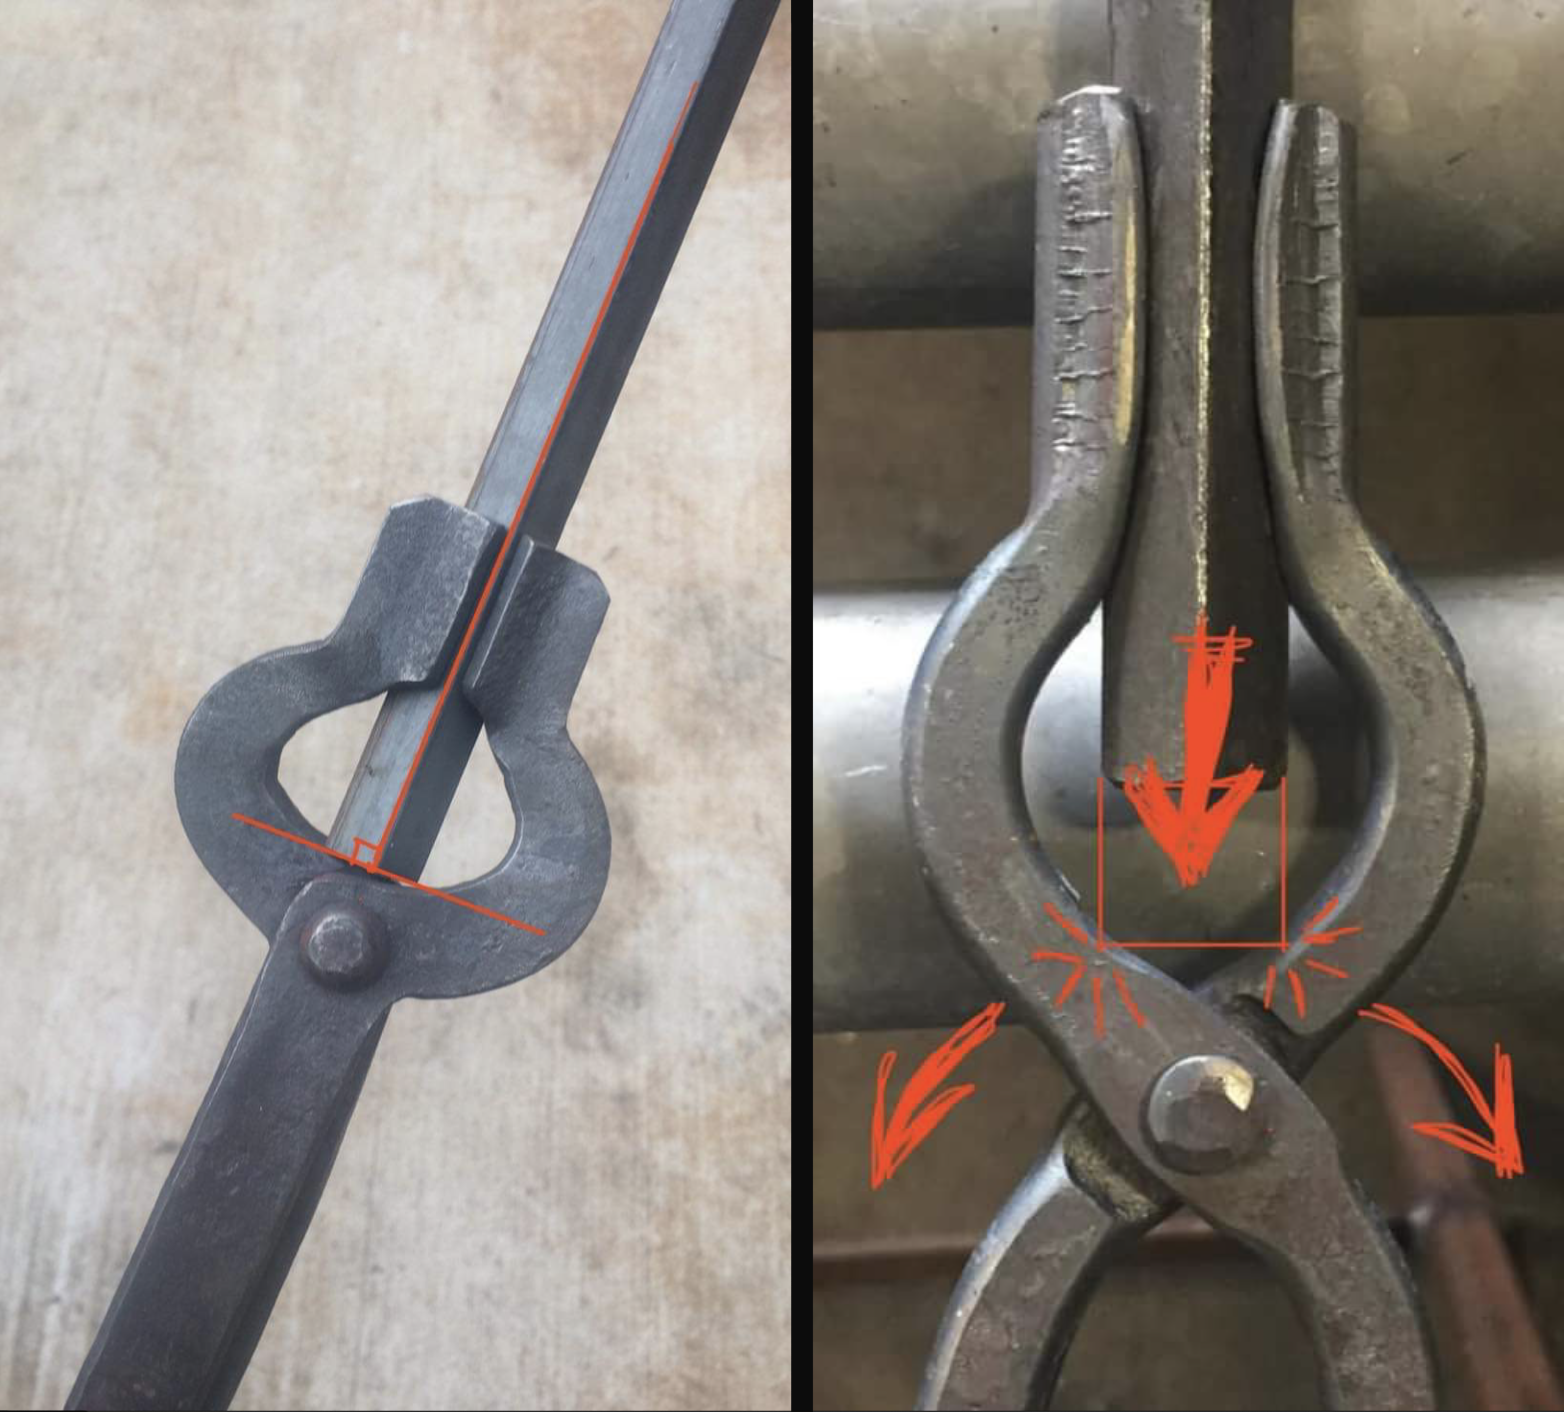
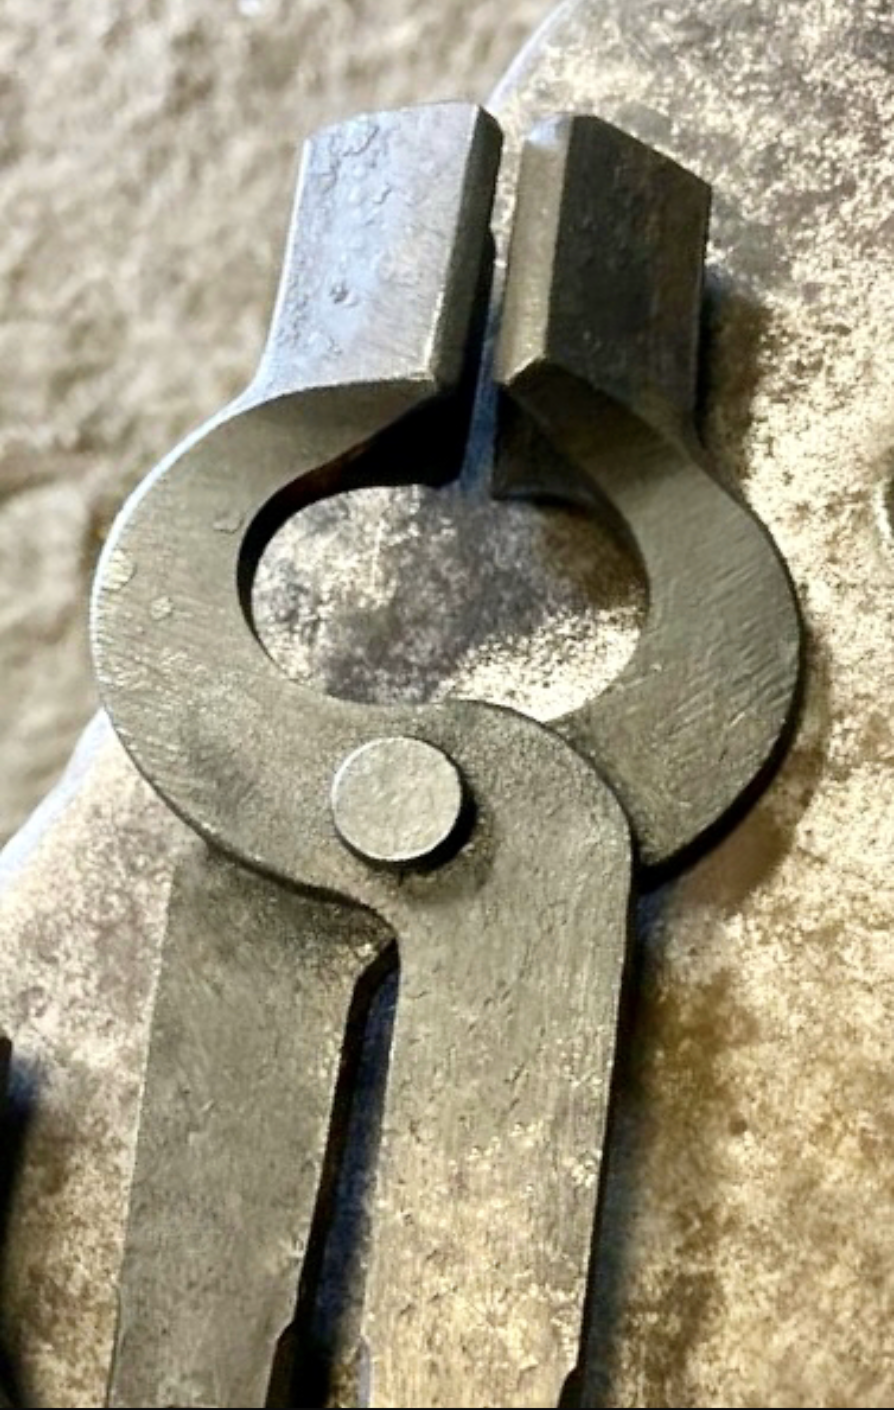
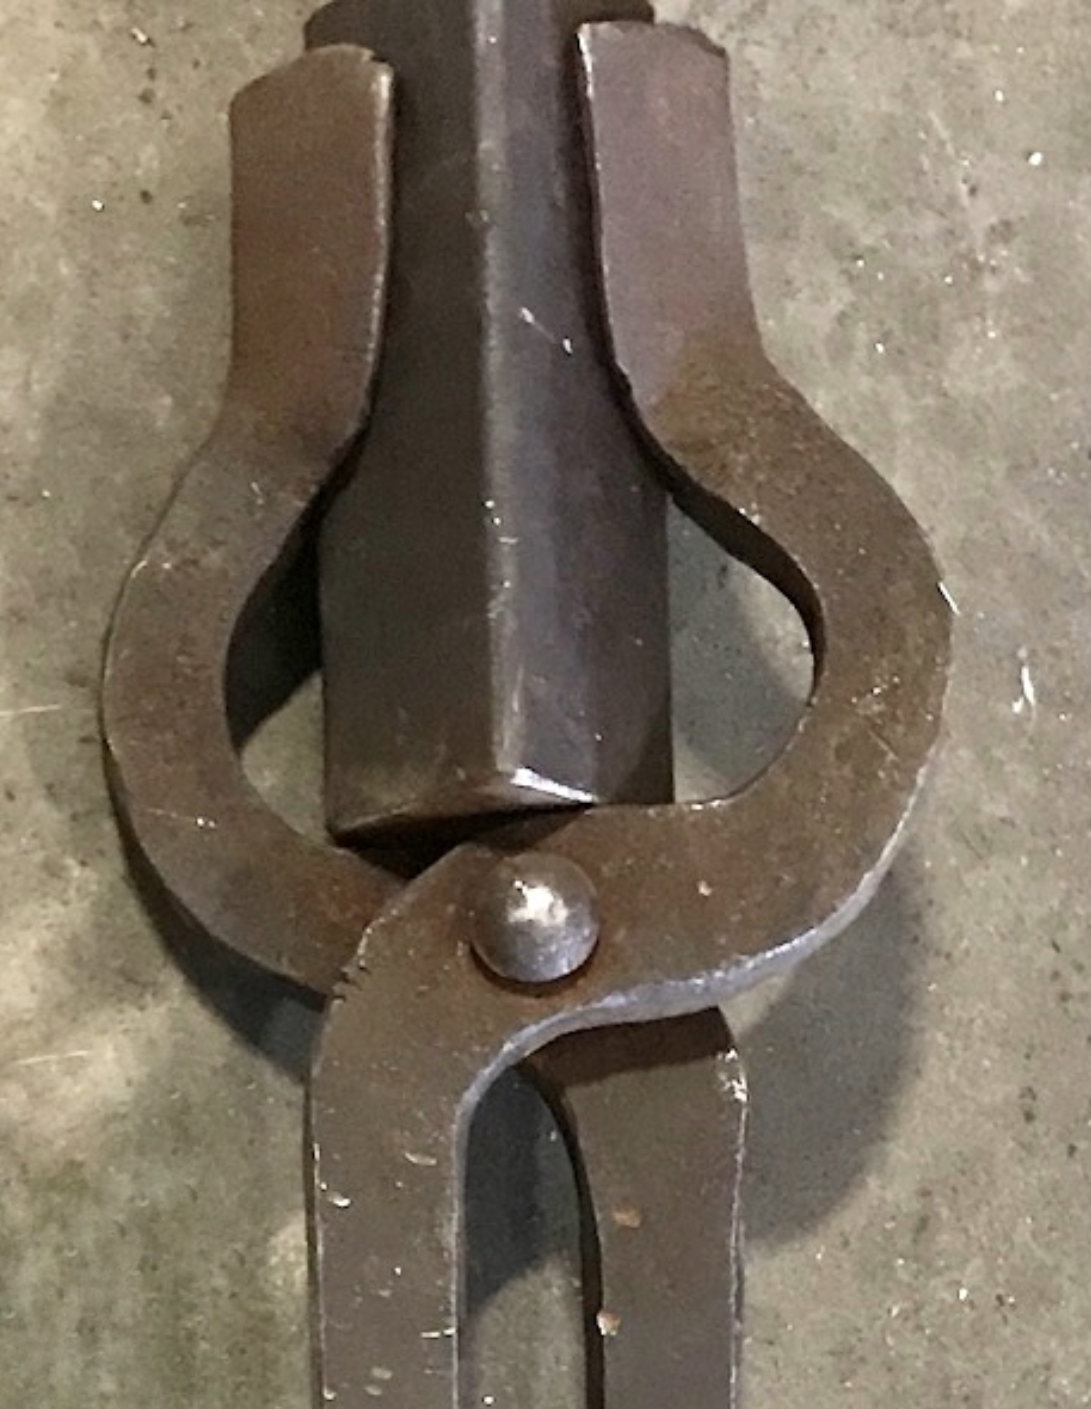
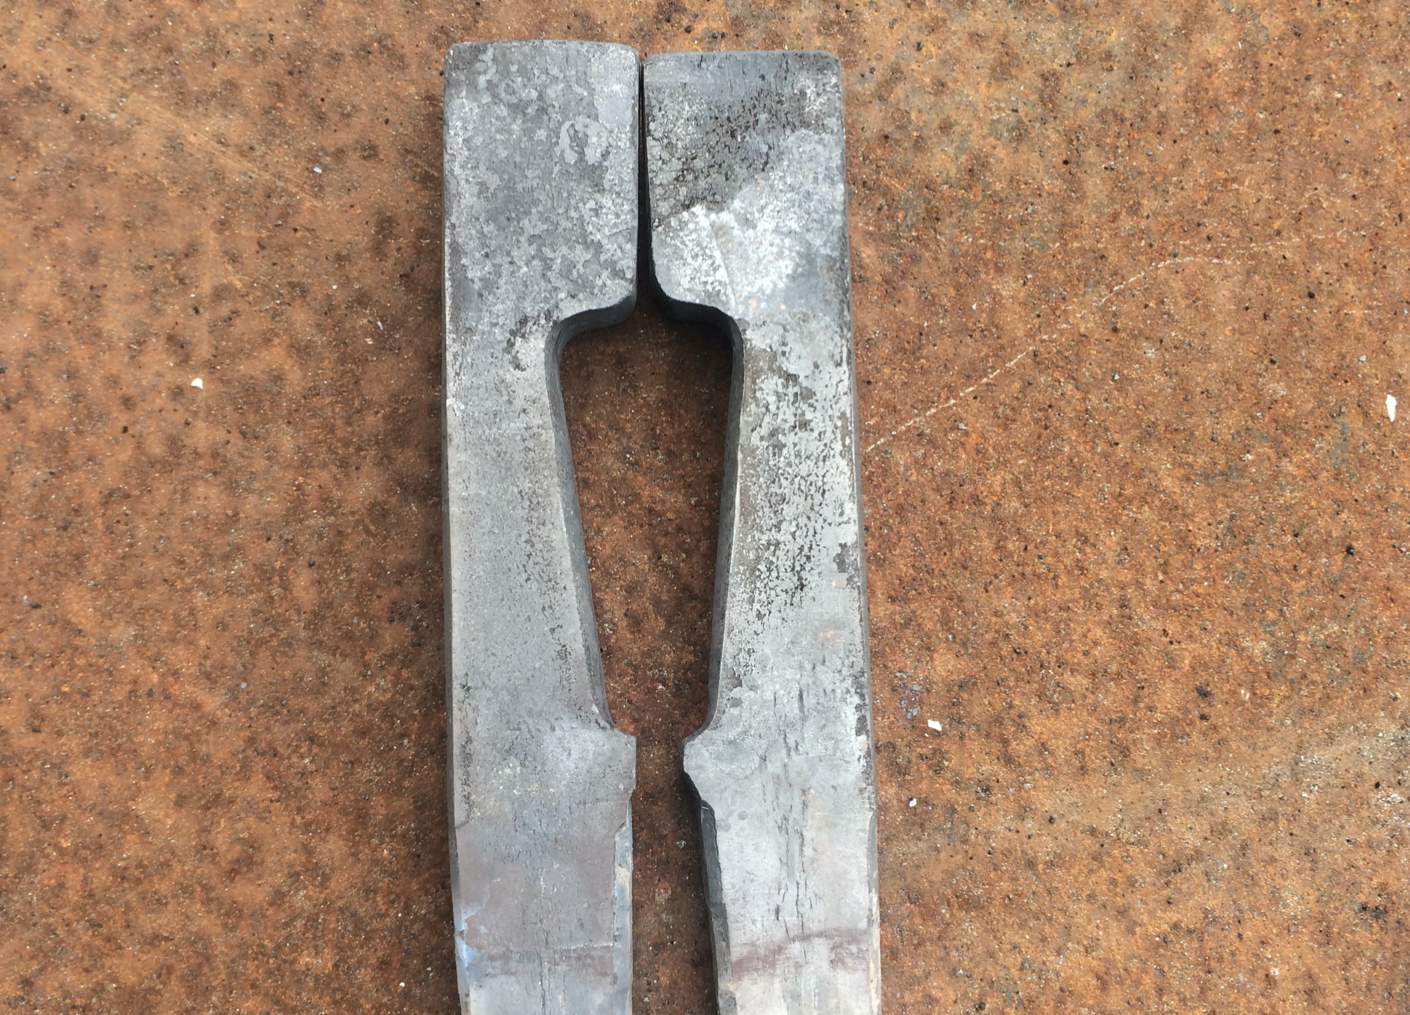
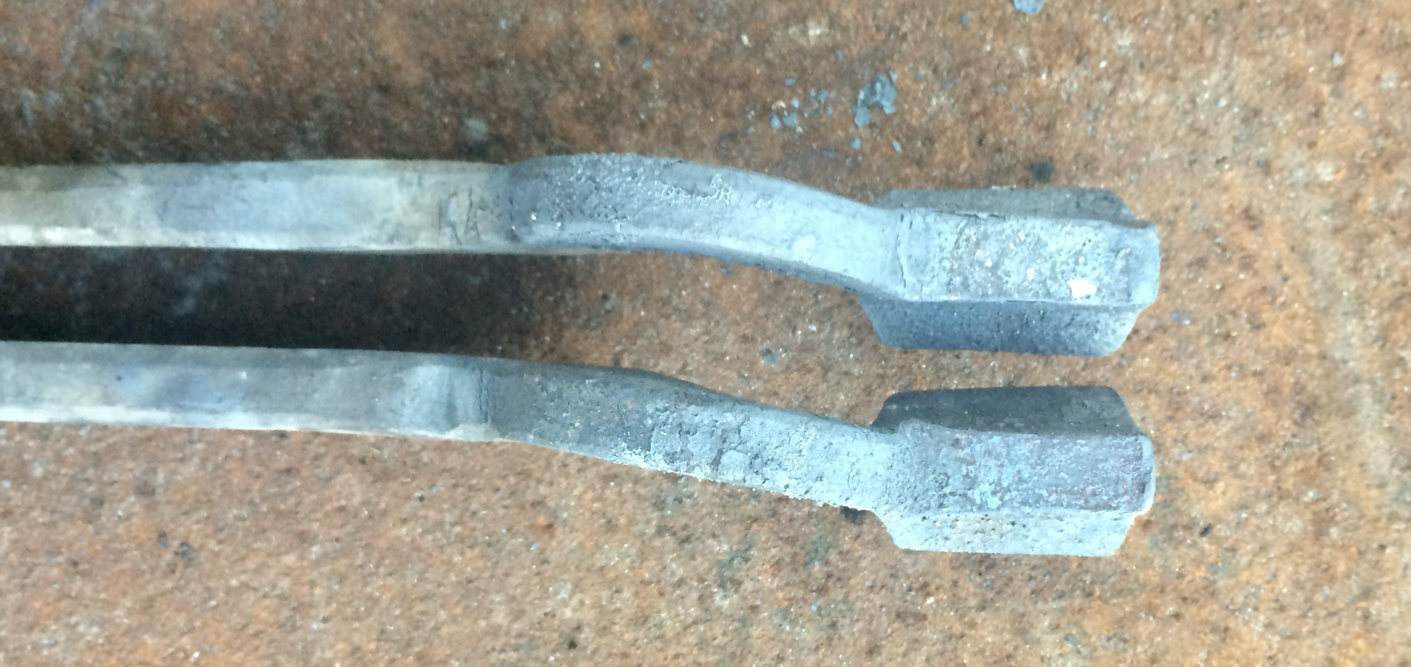
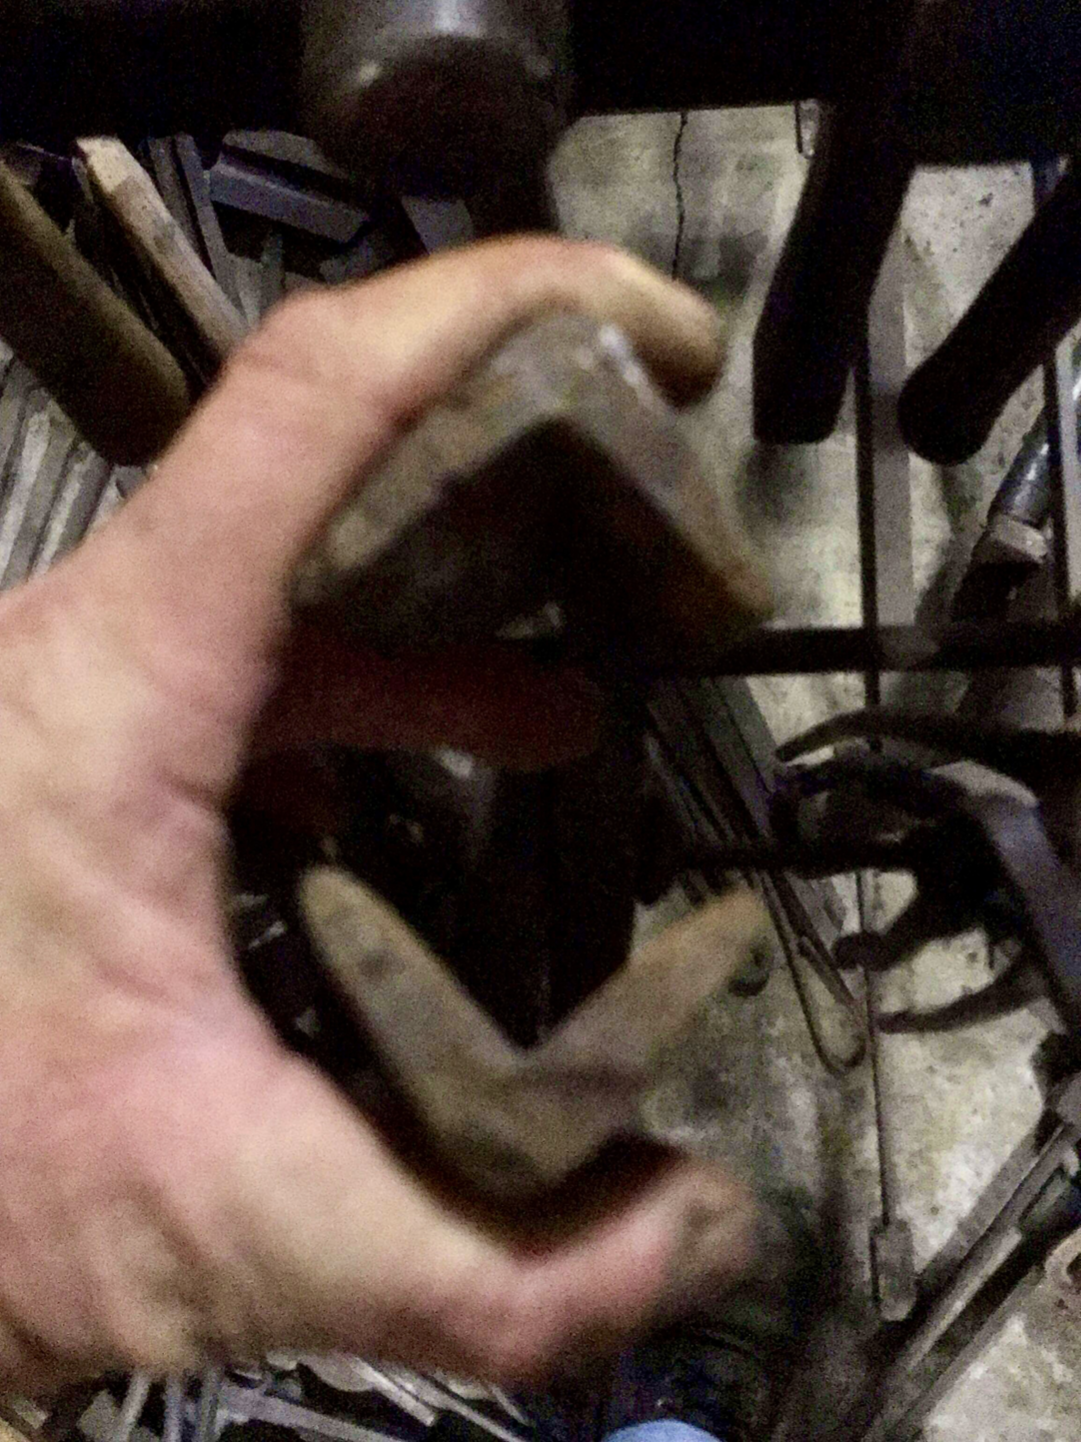
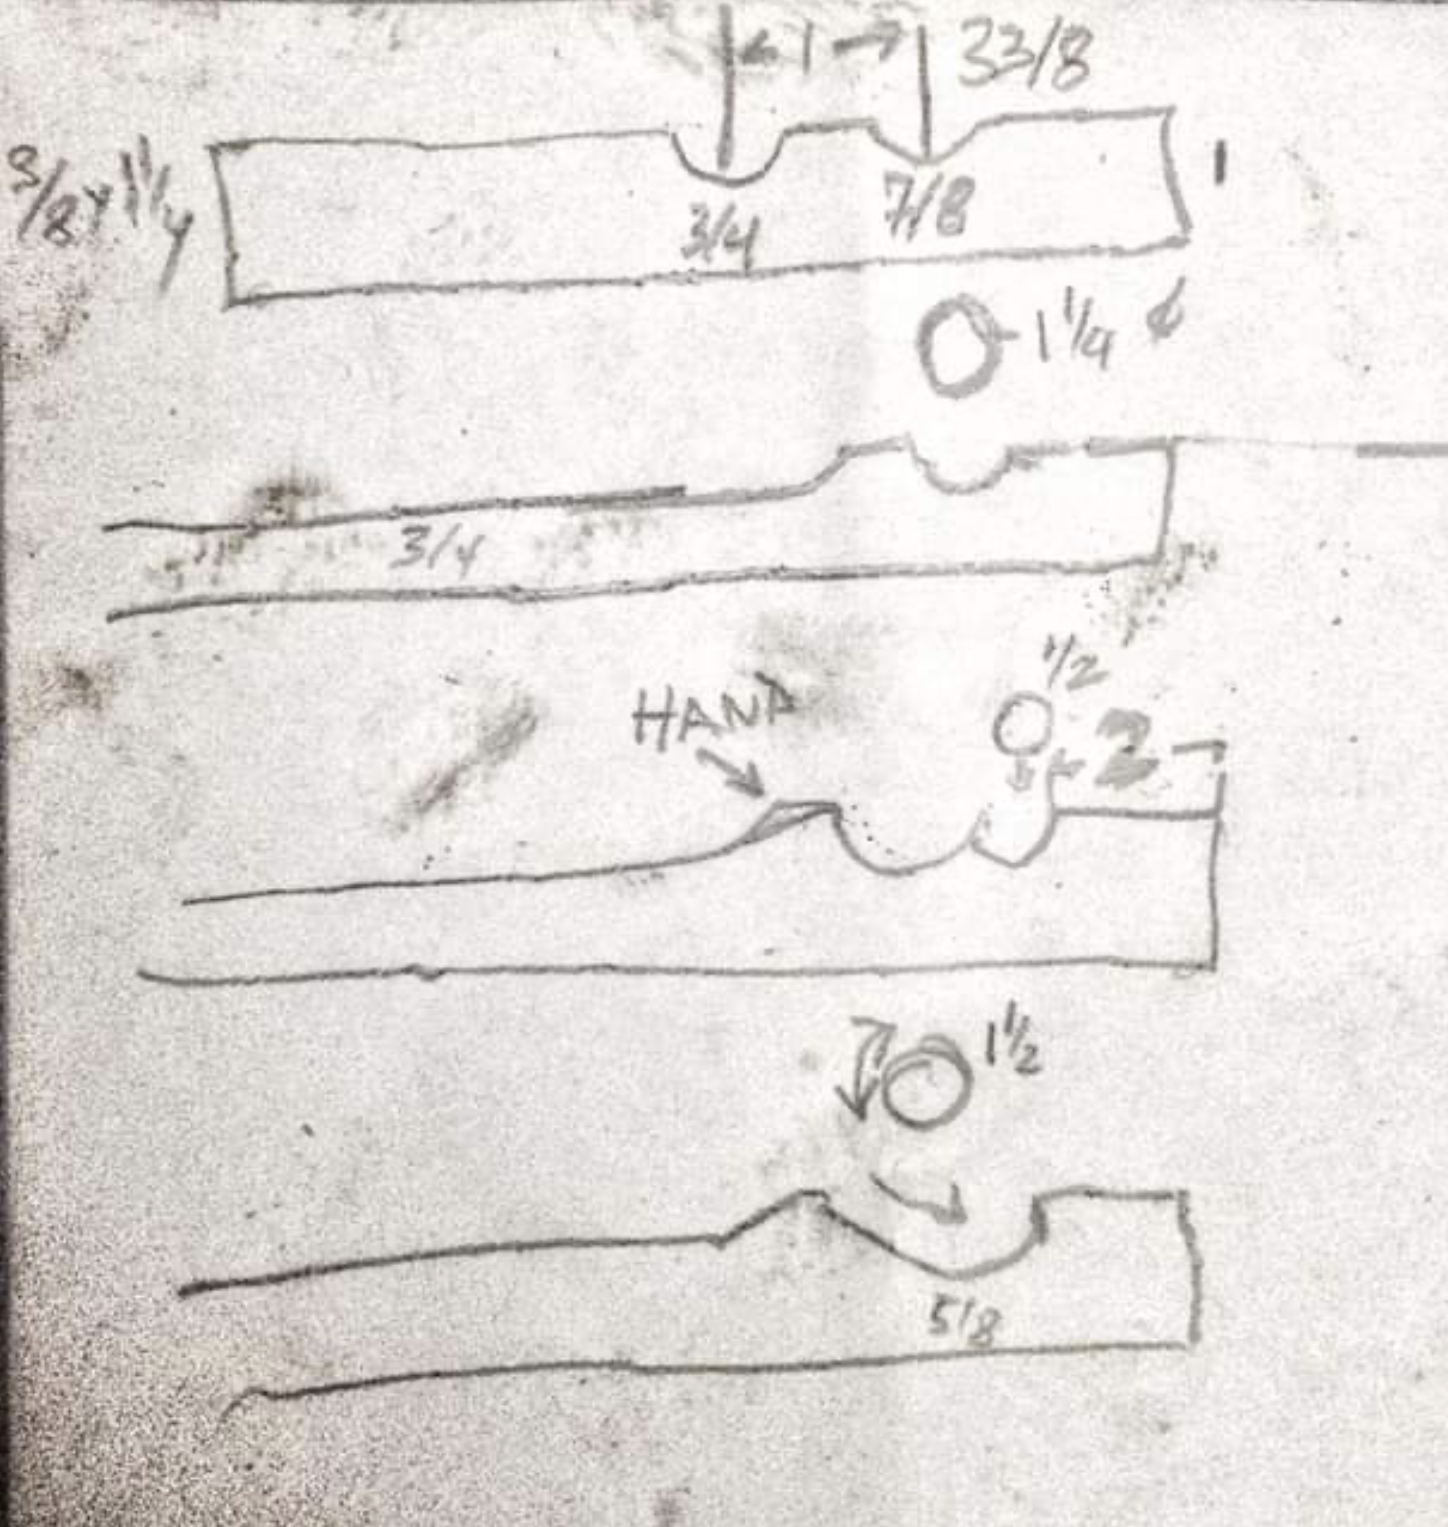
This is what I was taught about tongs by Art Jones, who was the former lead smith at Mare Island Naval shipyard. He made them only slightly differently than I do now. I think those were the first step away from the ones in the chart, and over time they’ve undergone a devolution into what you can buy from the many enthusiastic yet uninformed makers. Those tongs just don’t work very well, especially under the powerhammer and here’s why: 1. The area in front of the rivet must provide a place for the entire end of the stock to rest against, that is perpendicular to the centerline of the stock. If the jaws angle up from the rivet to the bits, and the corners of the stock rest against part of the jaws, as the rearward force from the blows of the hammer jar the stock repeatedly into them, it will pry the jaws open and the tongs will lose their hold, eventually not fitting the stock at all without adjustment.
2. The reins must taper from the rivet to the tips. There shouldn’t be a knob or out turn on the ends of the reins. This is so that a ring may be driven up onto the reins to secure the work in them. If you’re using the spring in the reins to hold a ring that you squeeze the reins to put on, when you’re at the hammer and you get a little excited or into your work, and give the reins too much grip, the ring will fall off. Also, reins that are light enough to spring together in order to put a ring on probably aren’t going to hold the stock tightly enough, unless it’s very light stock.
Art always used a ring on his tongs, but I was taught that first by Toby Hickman, in whose shop I was lead for several years in the late 90s. Toby reminded us that tongs were just a cool handle for hot stock, and we shouldn’t have to think about holding the material in the handle, we should just be able to use it as a handle. The ring solves that problem, as well as avoiding the fatigue and distraction that naturally accompanies having to constantly squeeze the reins.
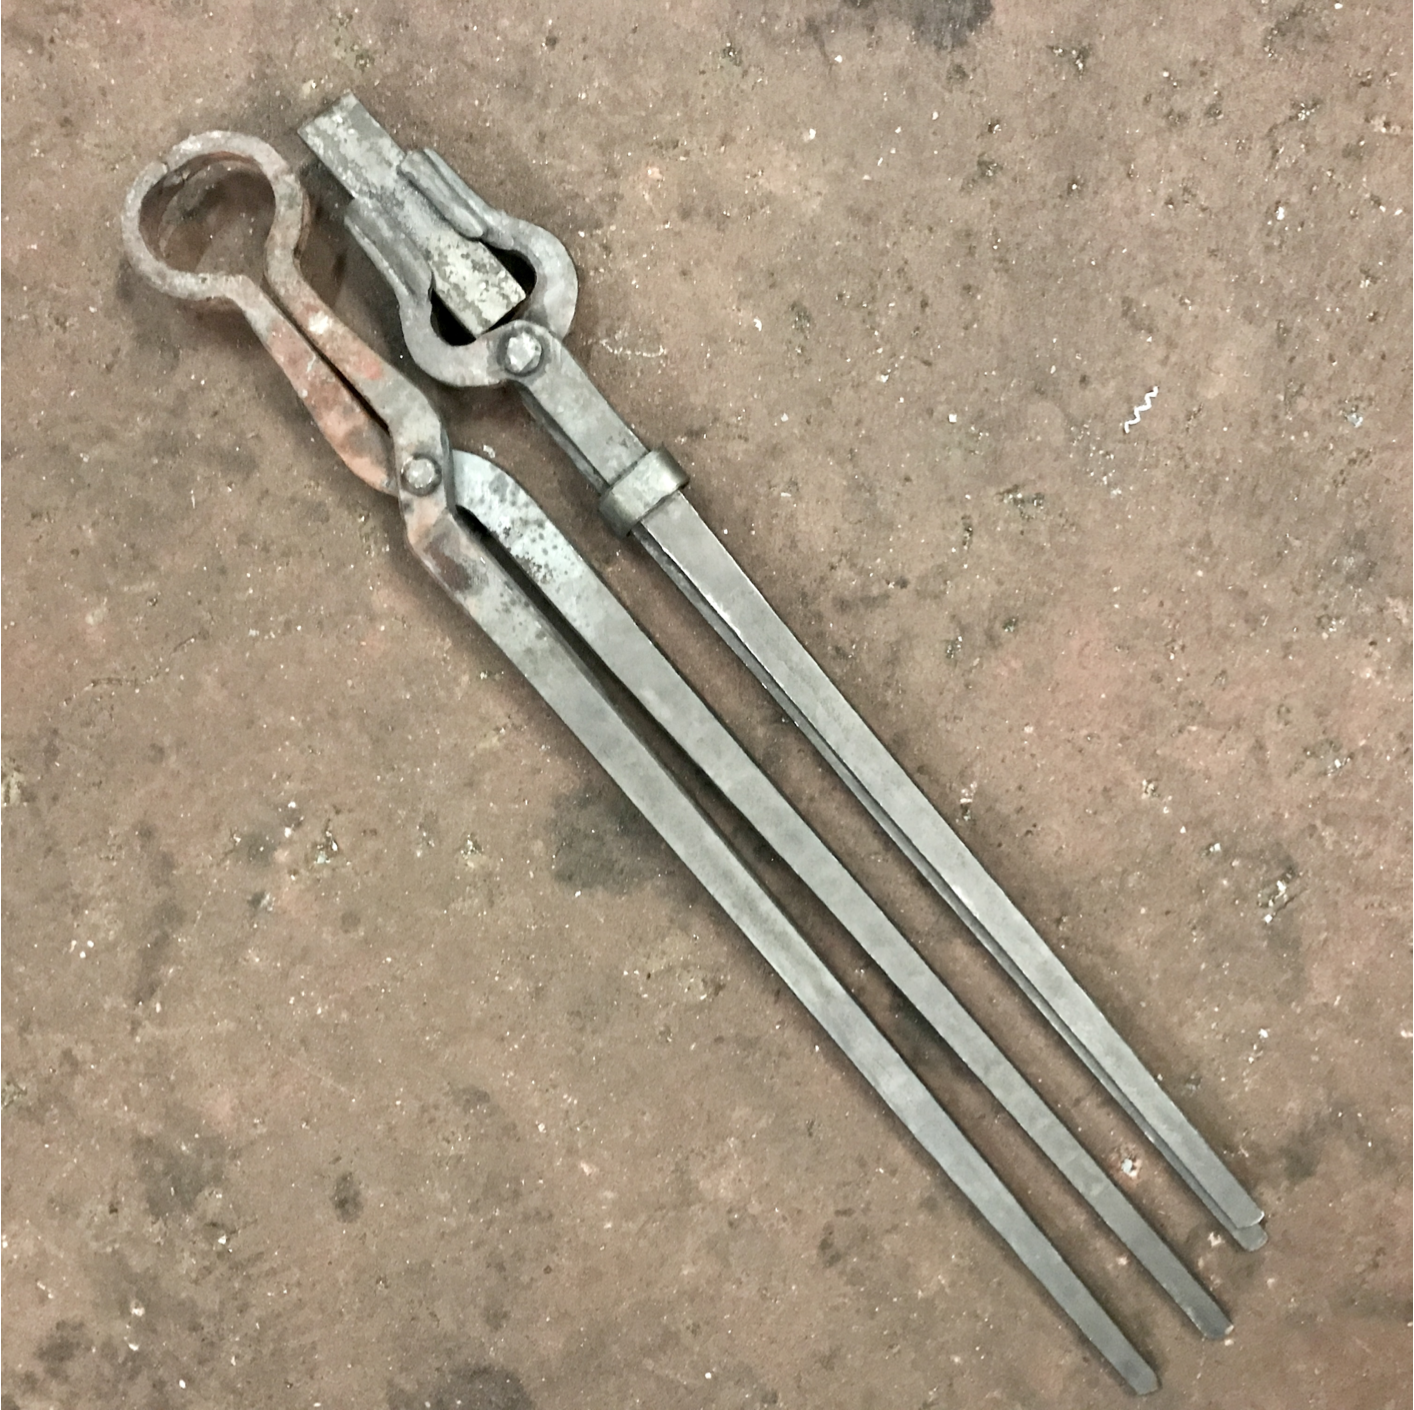
The tongs in the chart additionally, with their overlapping reins, provide a handle that is very similar to an extension of the material you’re holding, as if you had a longer bar that would not conduct heat, and you didn’t need tongs at all.
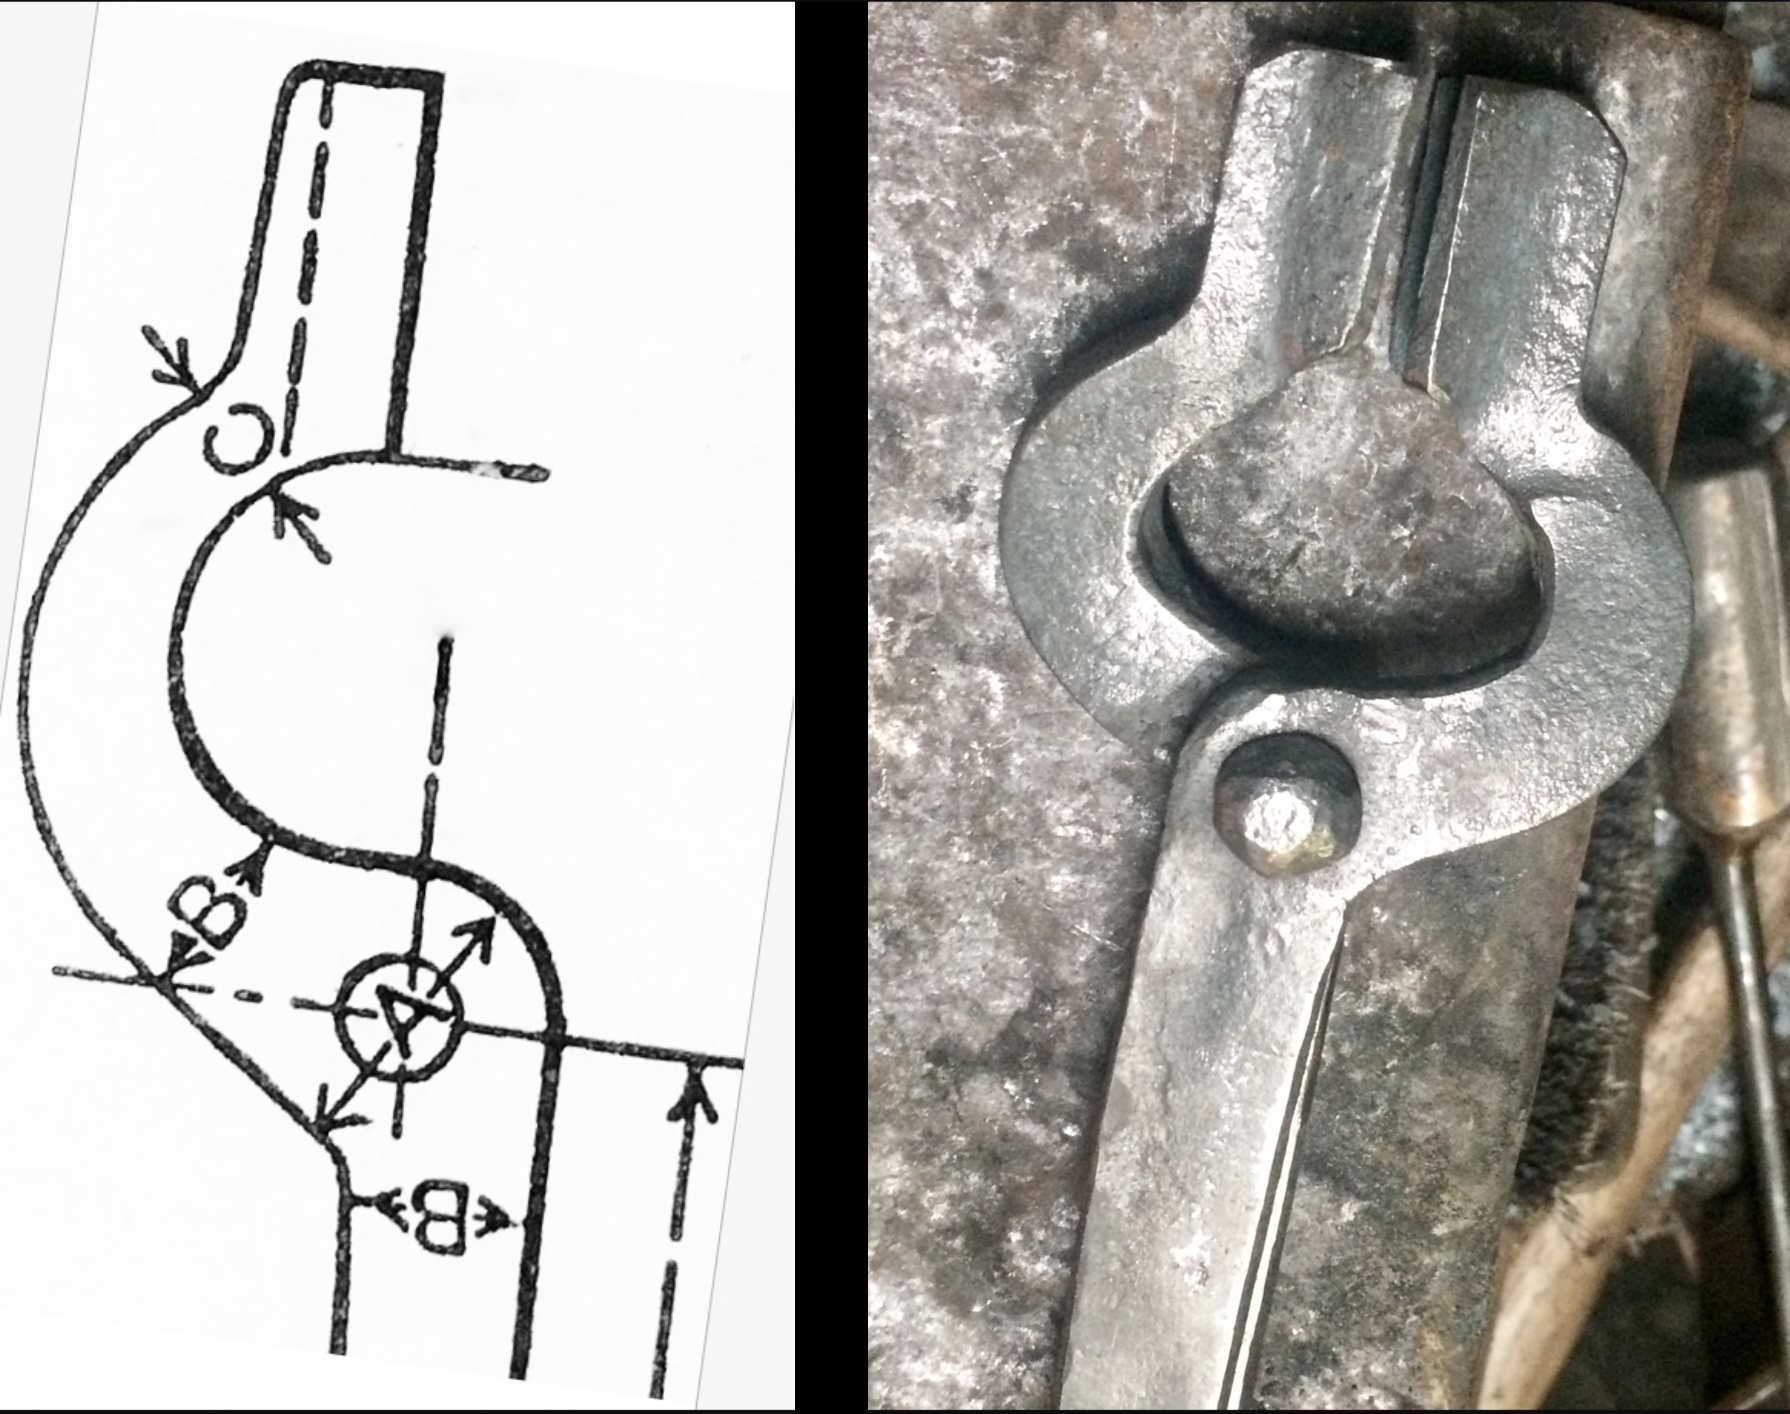
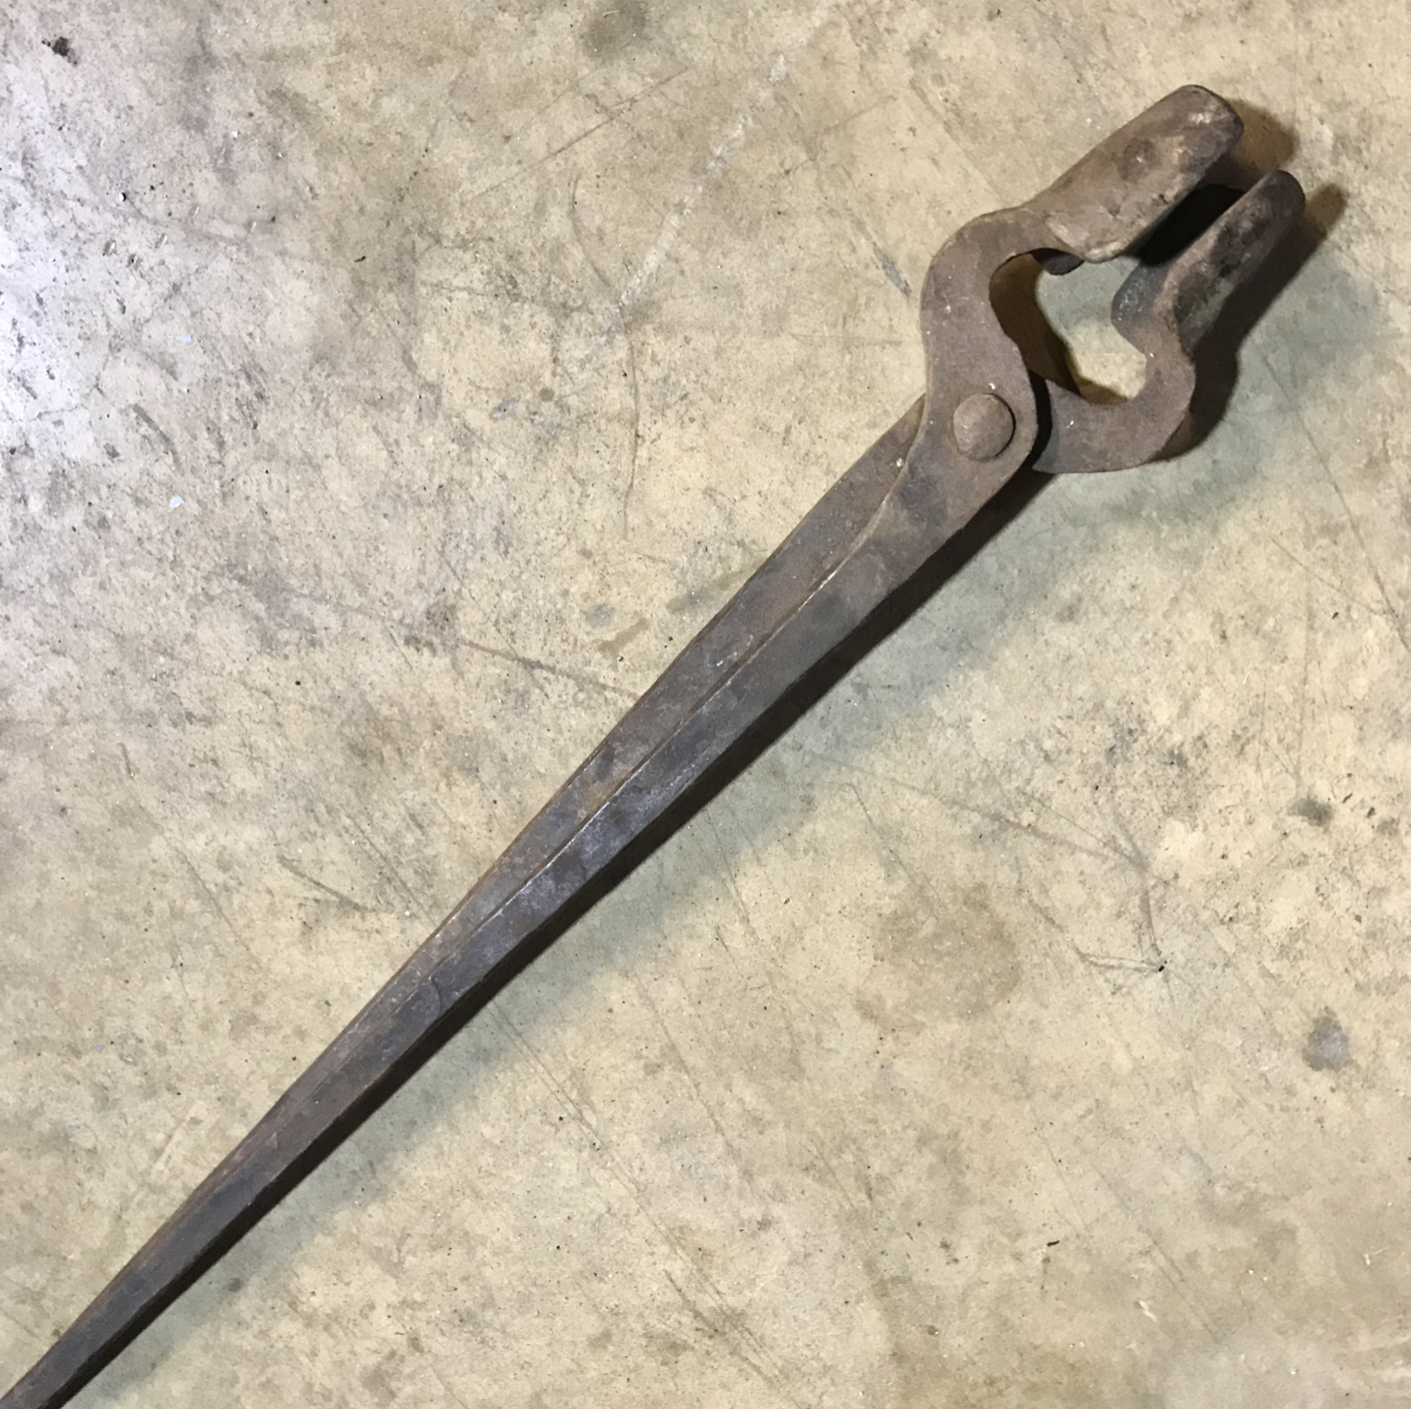
They won’t hang on a bar like other tongs because the bar will open the reins and they’ll look clumsy and get in the way. One solution is to weld short pieces of pipe, or rings to the rack to drop the reins into, which is also an organizational aide. There’s no way to put the convenient but hazardous gap in between the reins behind the rivet without putting the rivet in the wrong place, weakening the integrity of the tool.
Or by not making the square bend, which also makes for a weaker pair of tongs, even though the style may now be more frequently found in industrial shops.
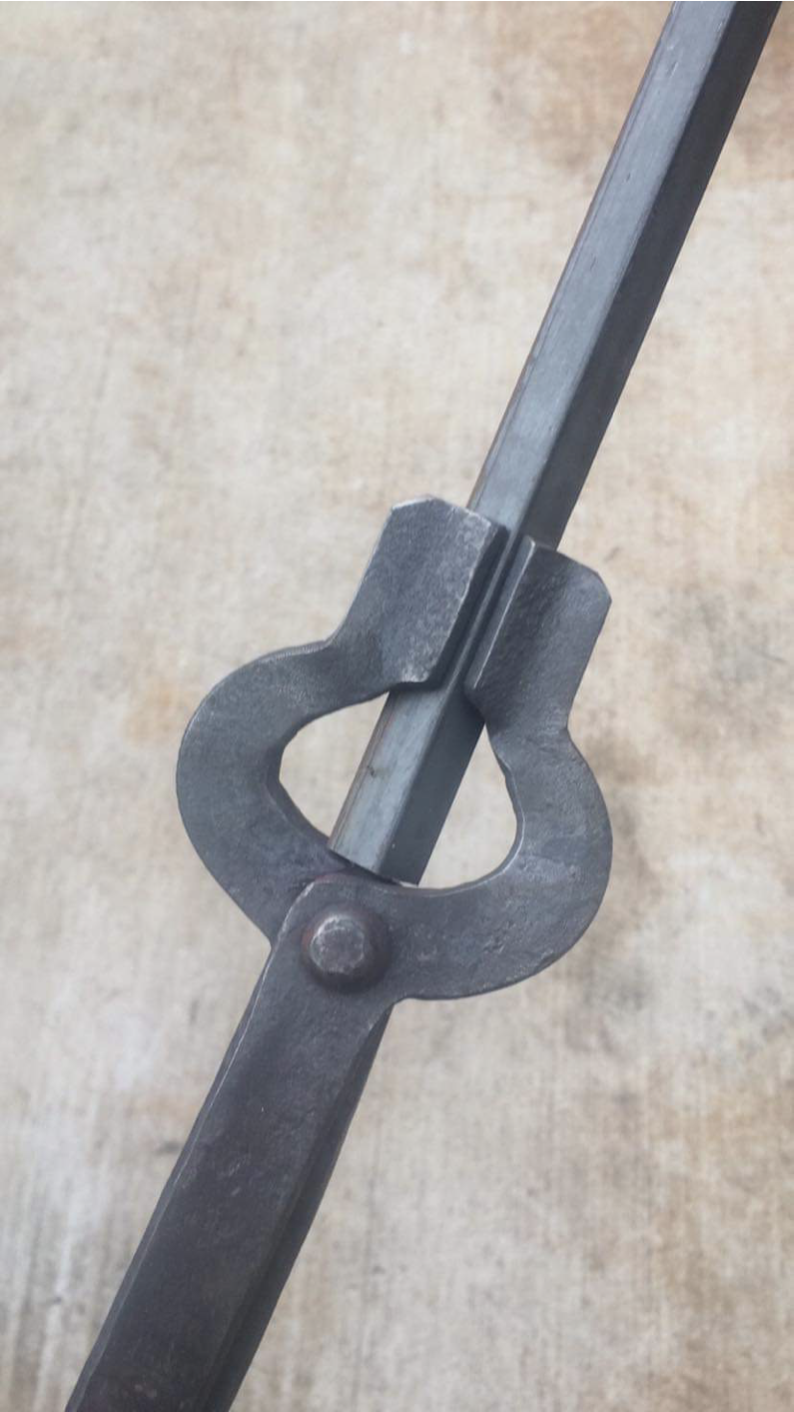
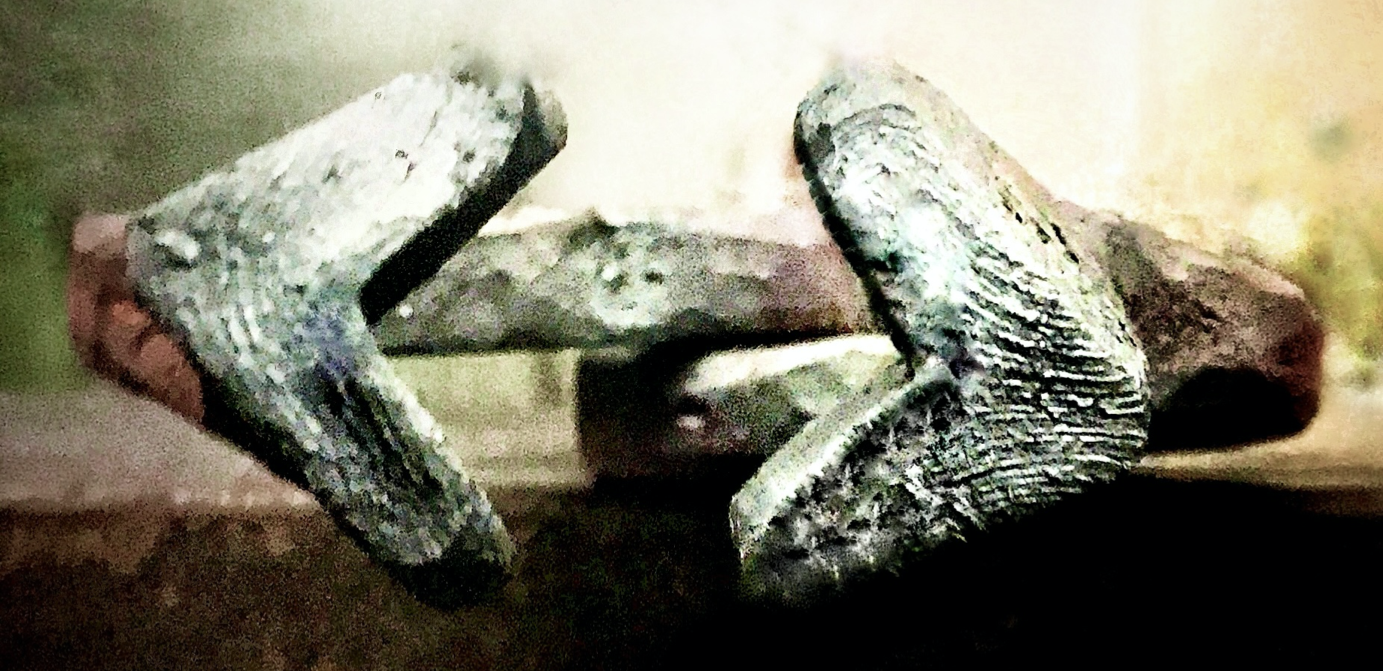
 Goose Jaw Tongs Comparison Goose Jaw Tongs Comparison
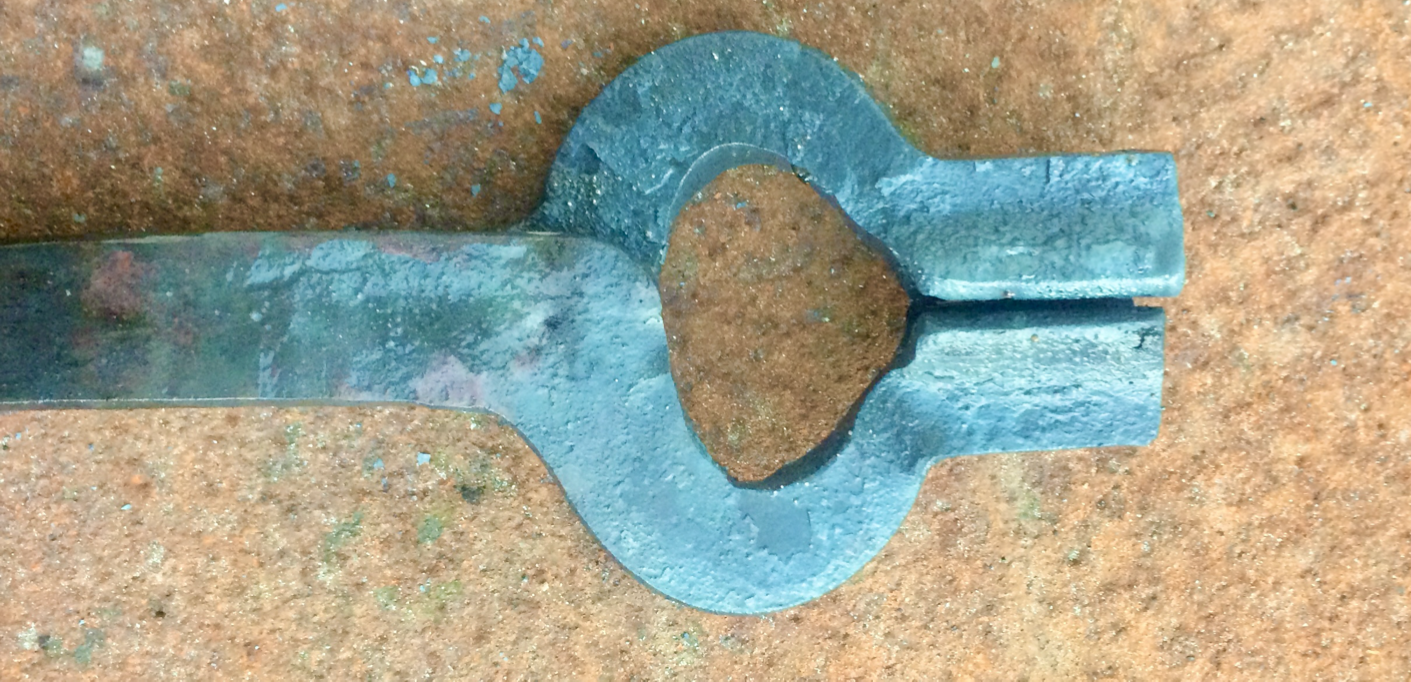
The misplacement of the rivet and elimination of the square bend are among the very first historical steps in the devolution of the making of tongs. It was done because it’s easier and faster to bend the rivet boss around a pin than it is to make a square corner, and in industry, faster is often considered better, even if you wind up with substandard tongs because of the cut corner.
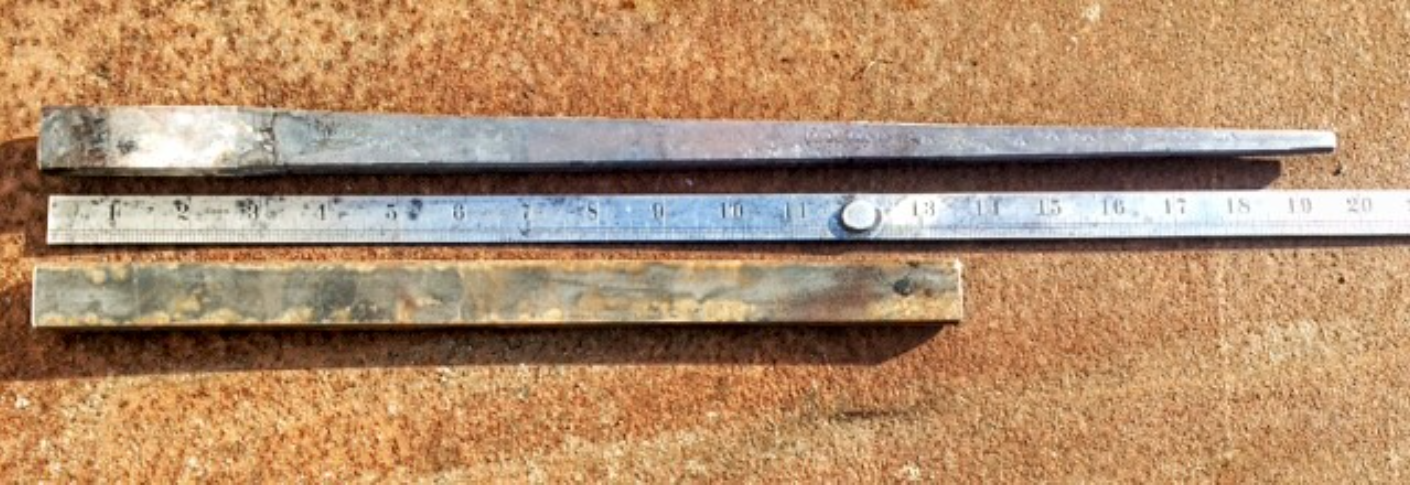
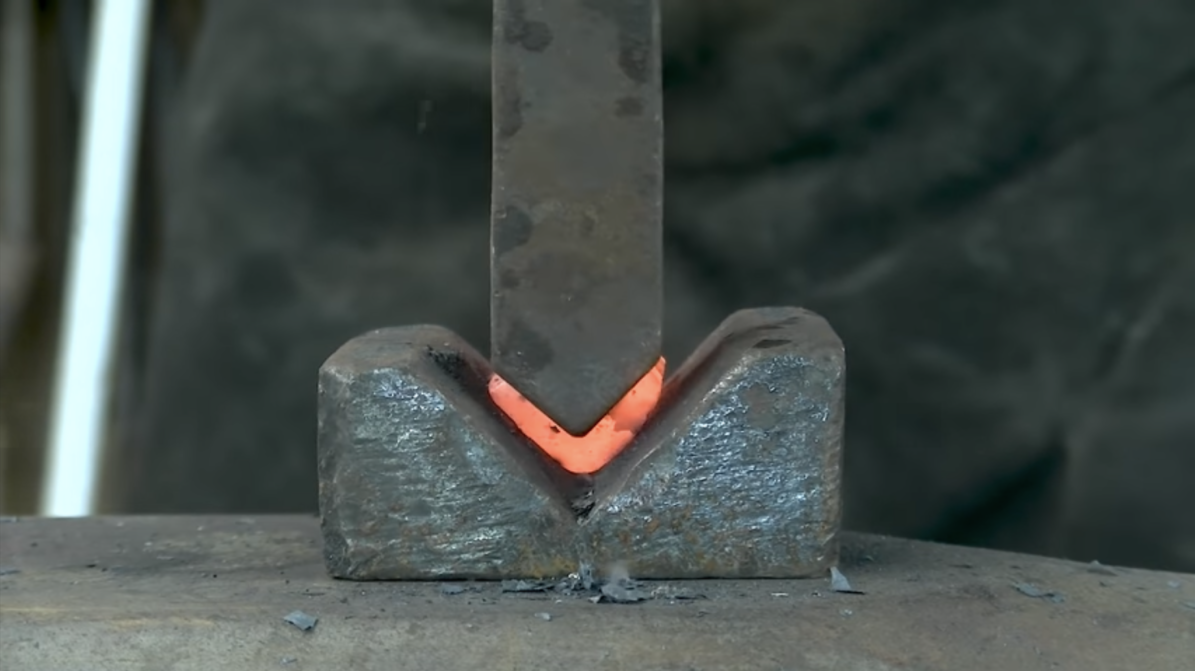
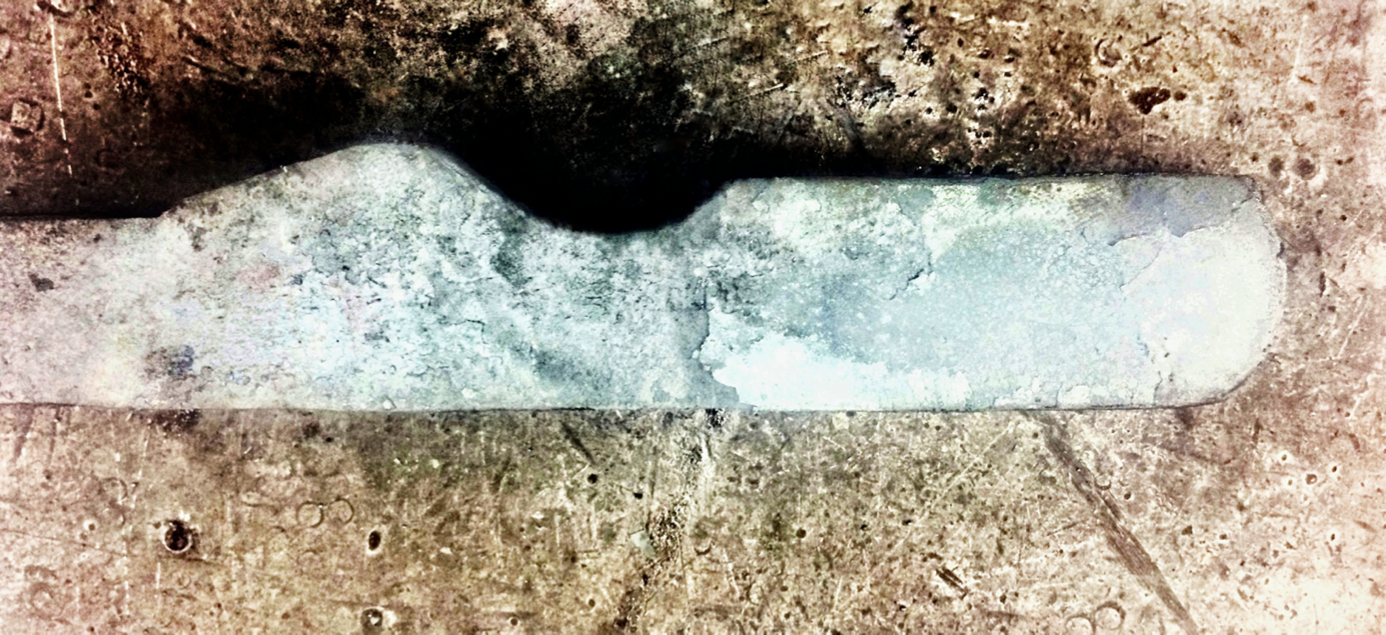
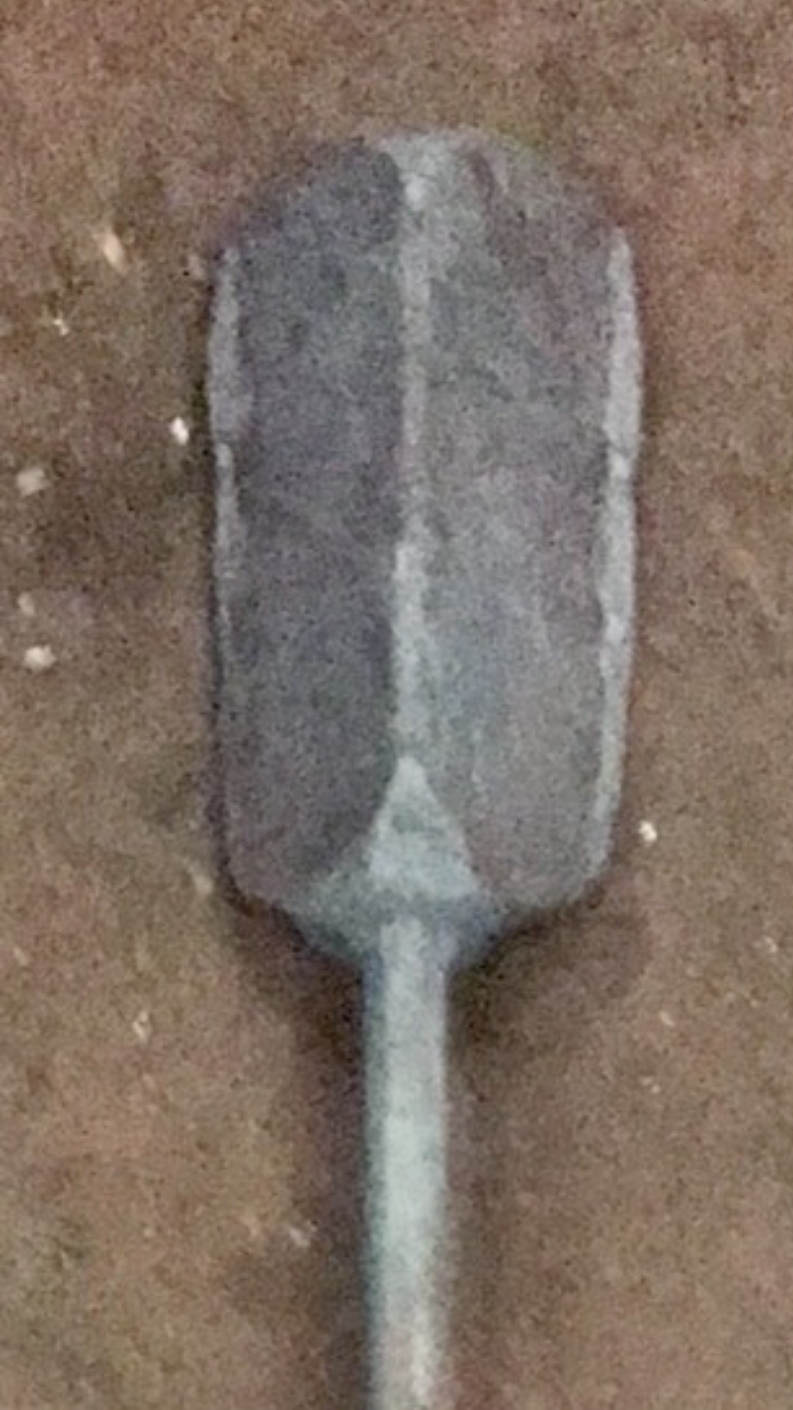
The bits in the forging progression pictures that follow, were made by splitting rectangular stock with a chisel and spreading them open. This is a fine way to do it without a press or hammer but it’s also easy to mess them up by cutting off center or allowing the end of the chisel to drift. The bits are sort of the hardest part of the tongs to get right, so should be done early in the process.
 Goose Jaw Tongs Comparison Goose Jaw Tongs Comparison
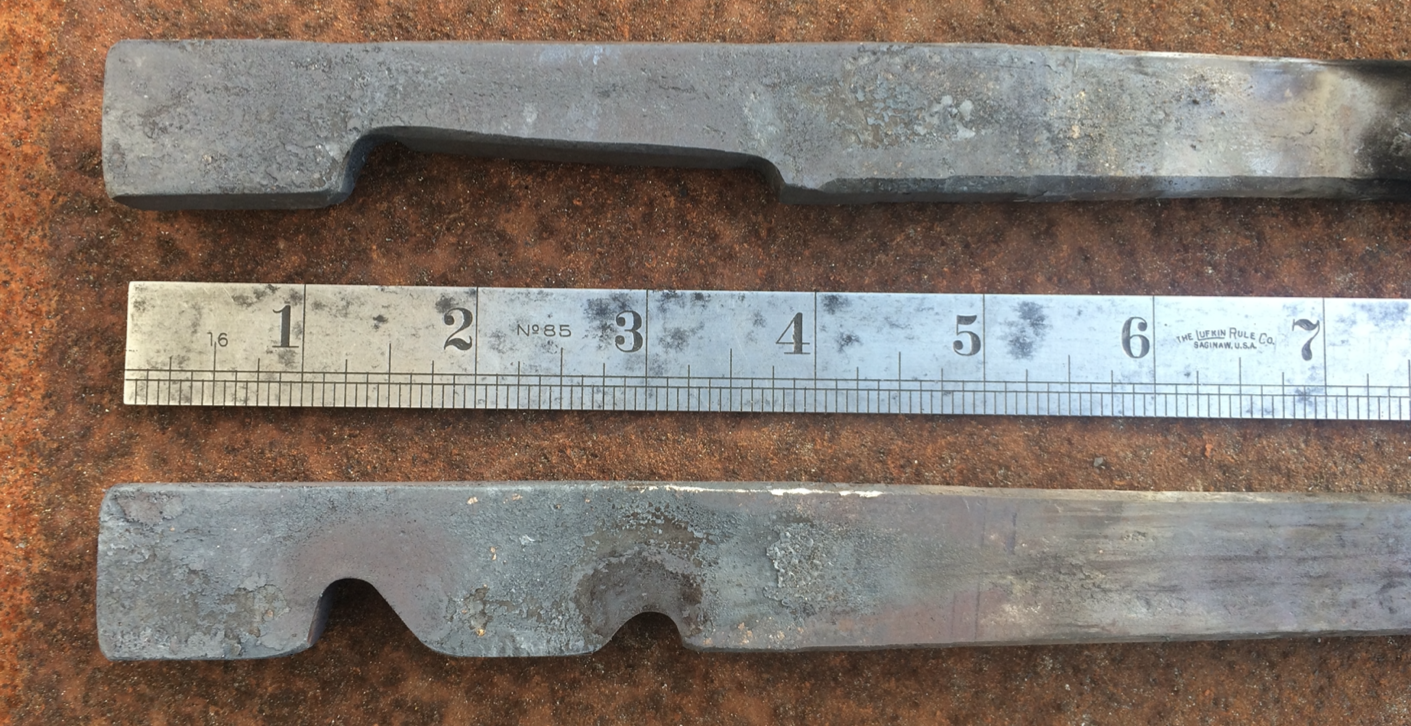
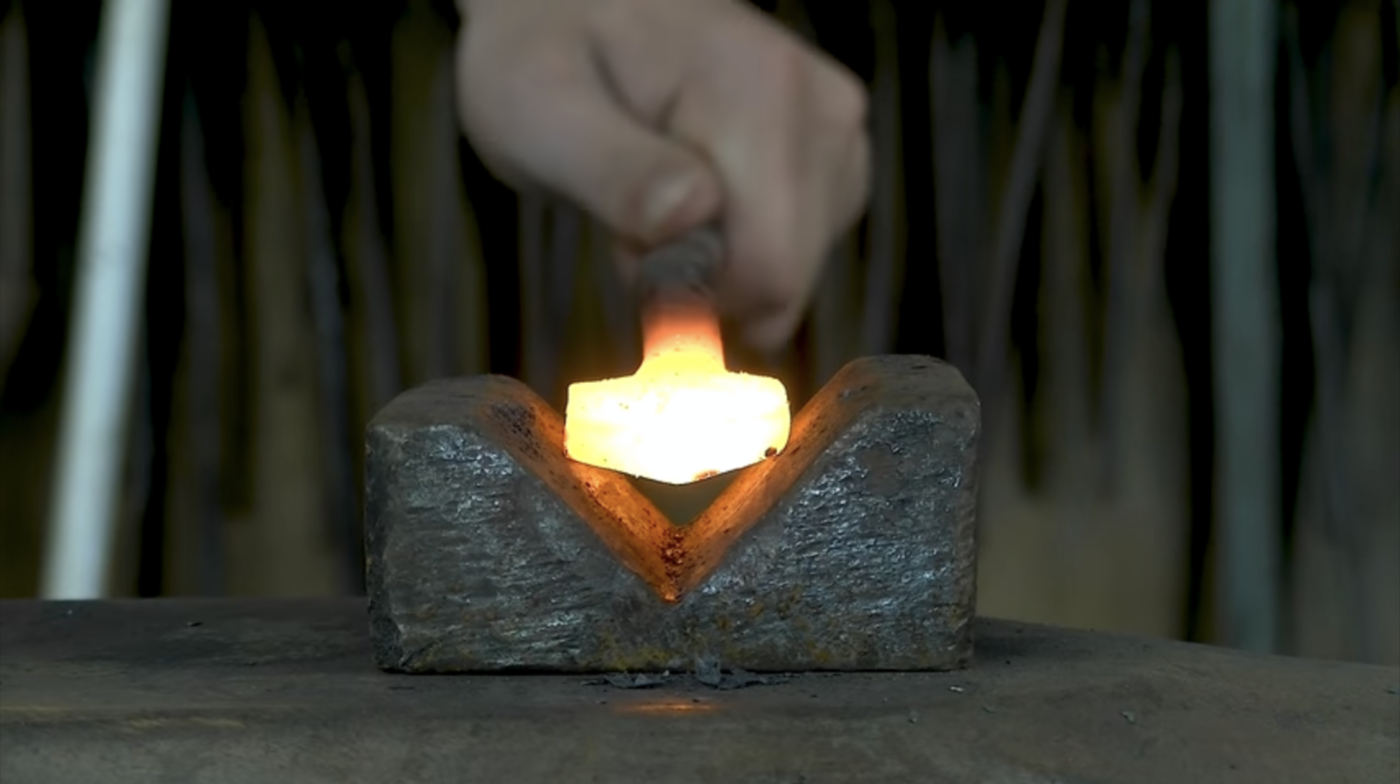
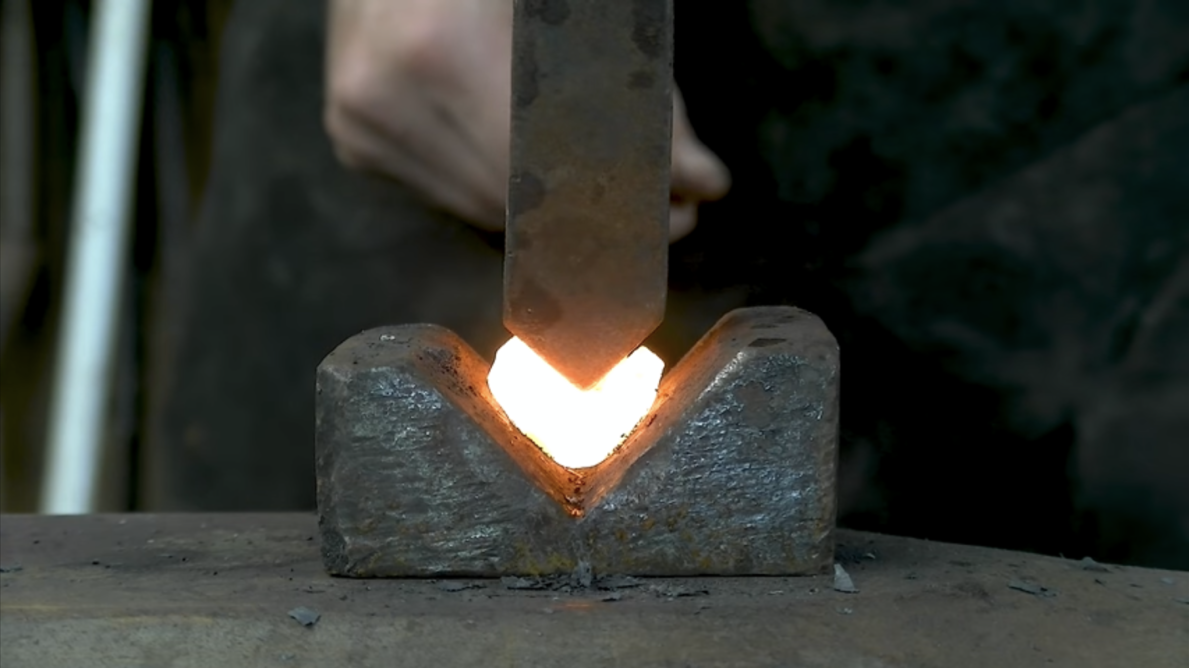
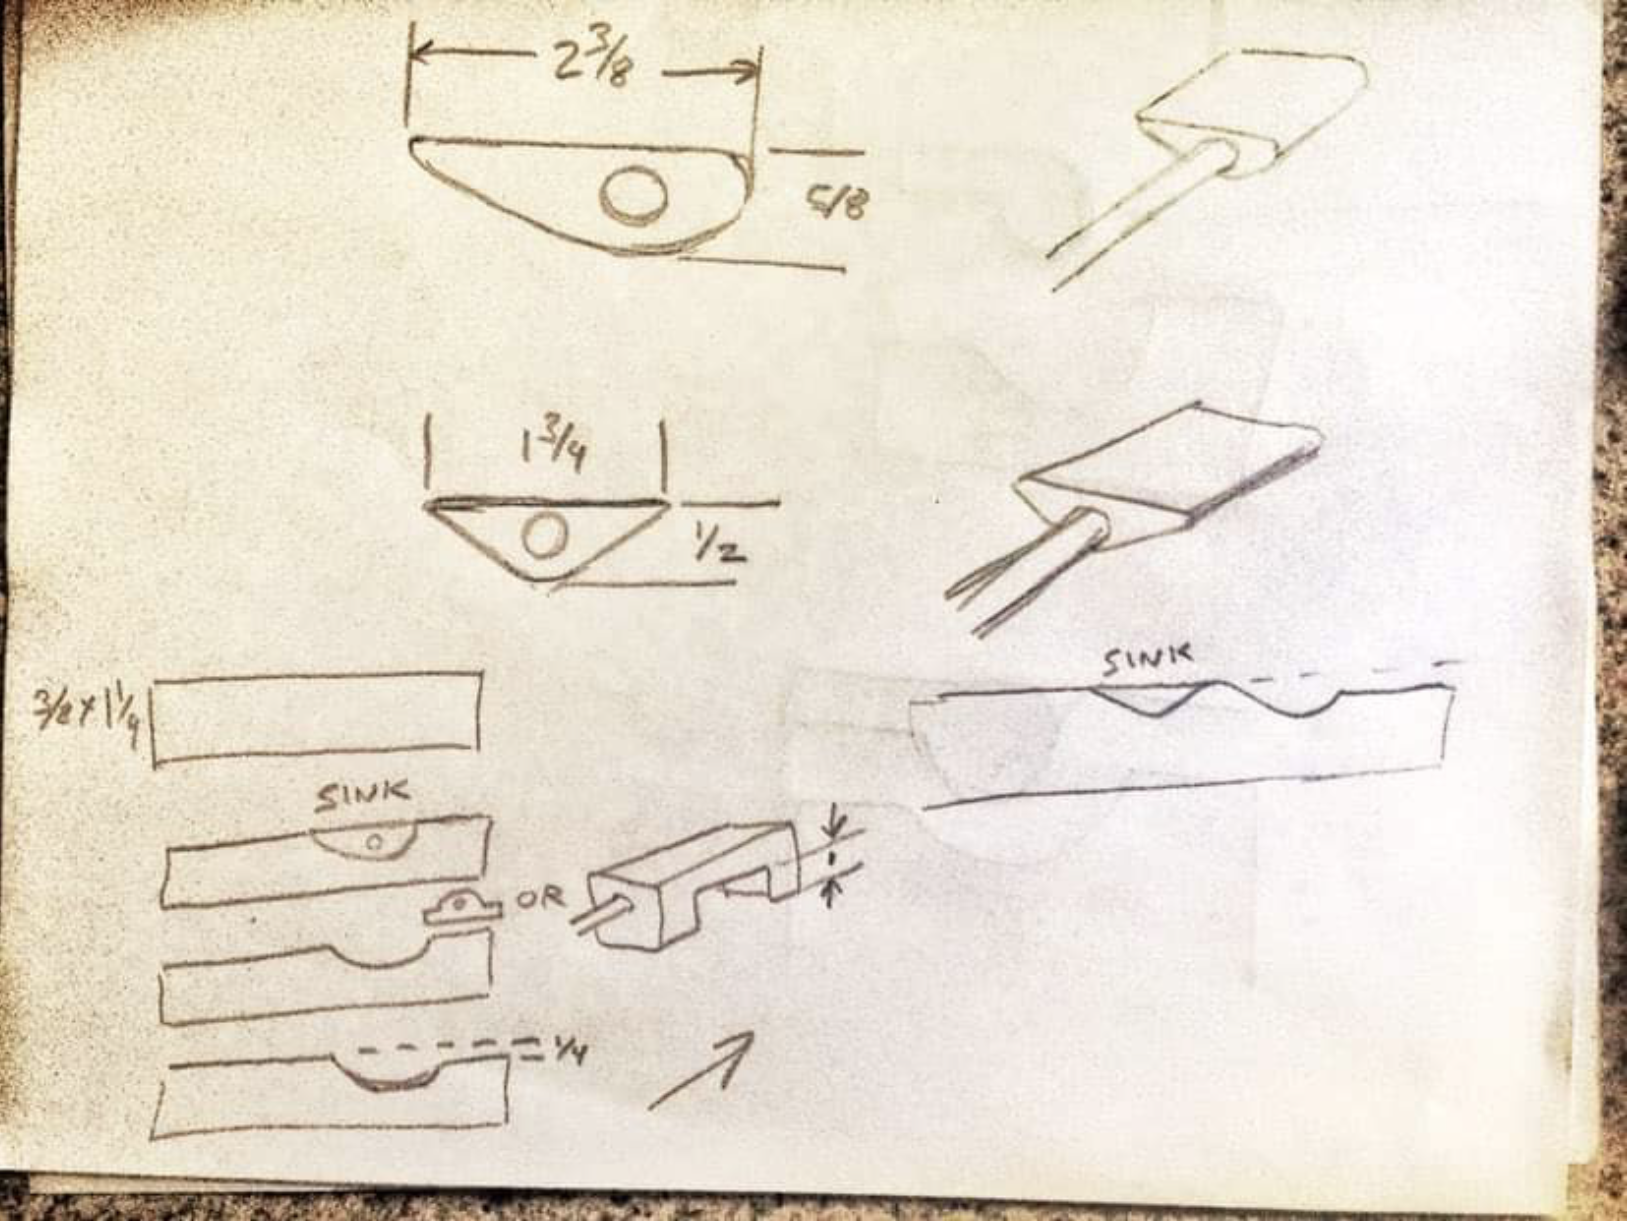
This is press tooling I made to form the bits. Those male and female v blocks affix to the press platens so they're always in line and centered, this makes short order of forging sturdy bits. 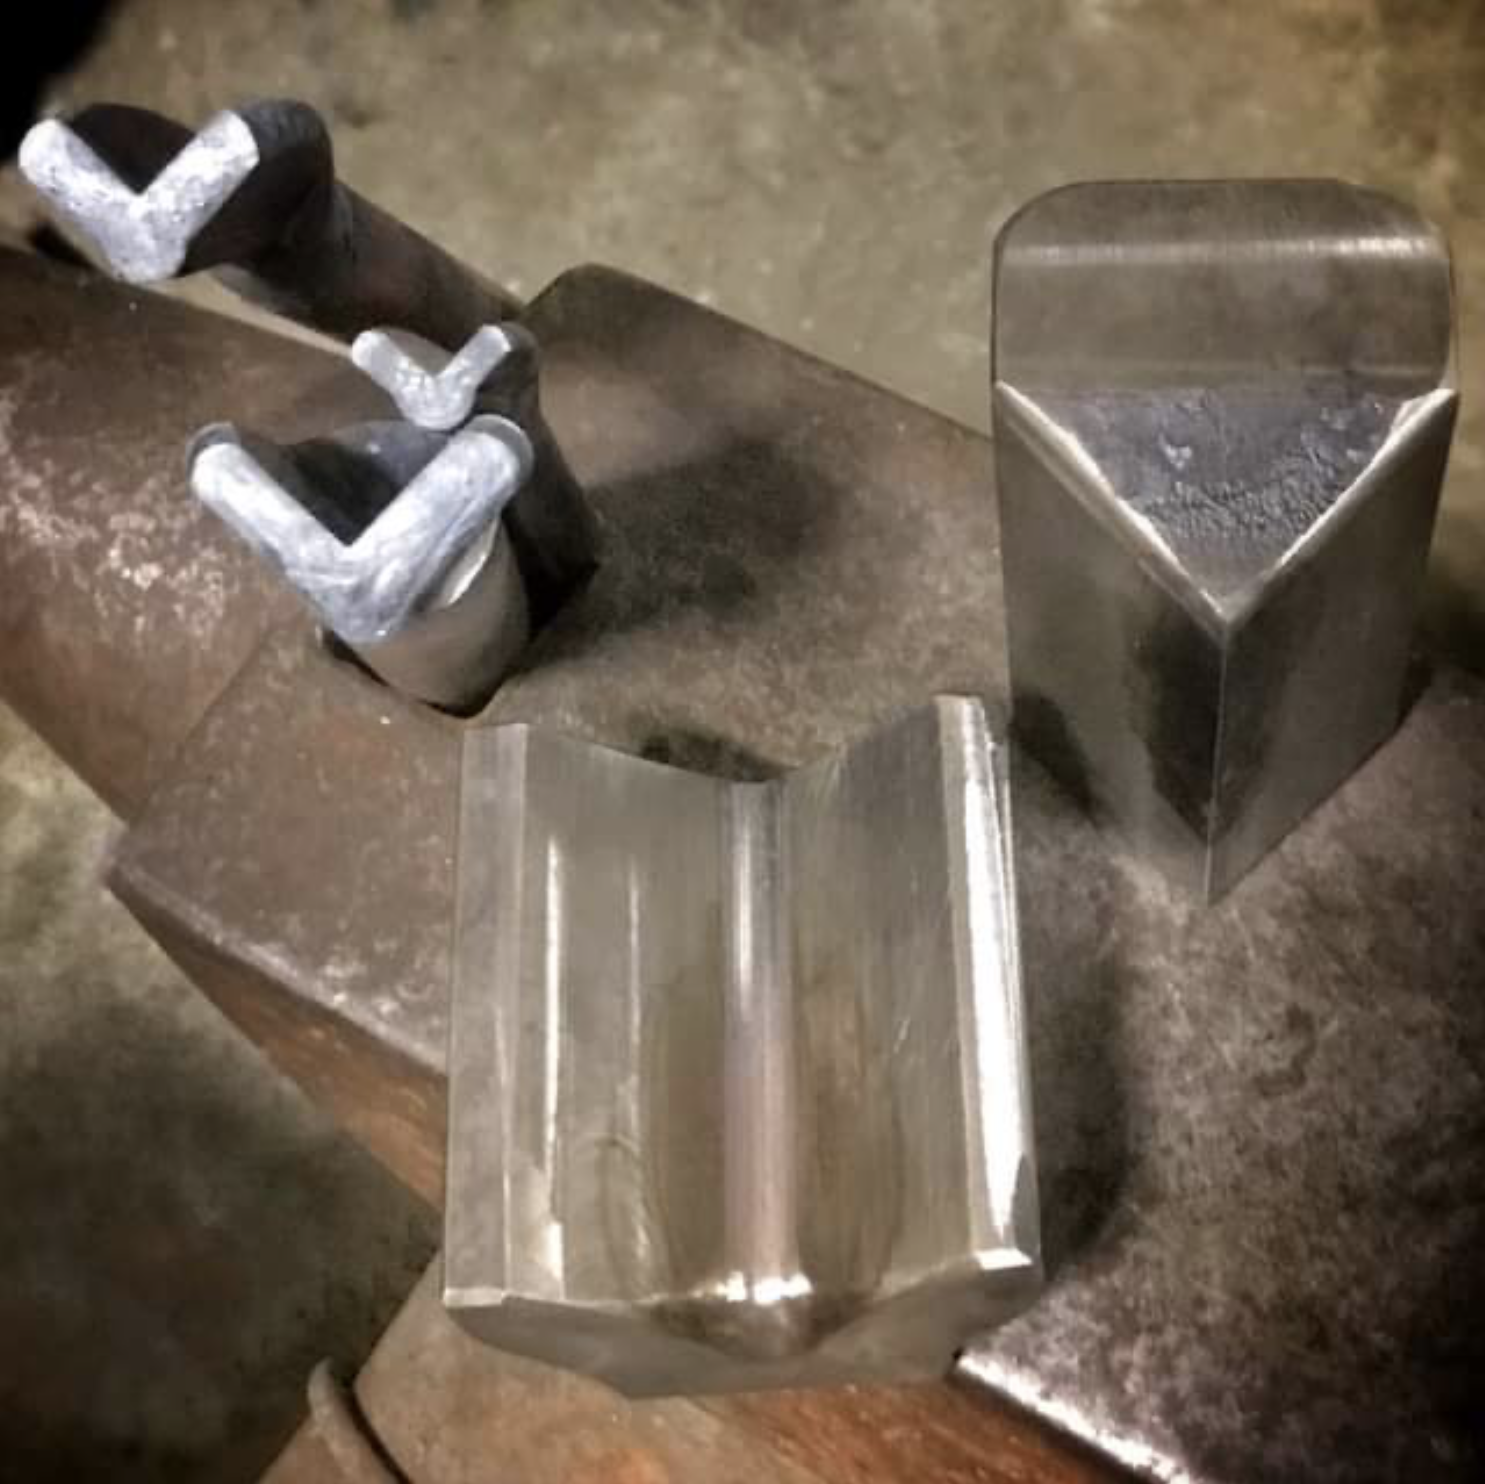
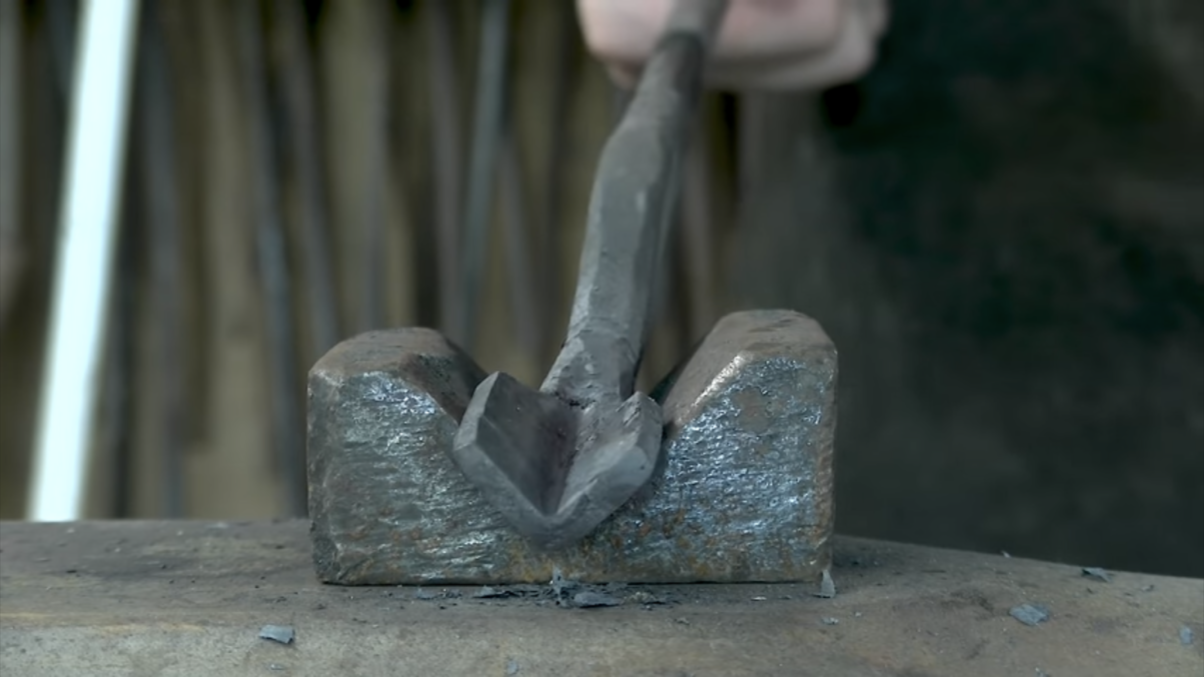
I’ve also done them in the hammer with the less than 90 V block I made for making the side set, with the least acute angle of the side set as the top tool. The bits on the next pair were made with the side set to the immediate right of them as the top tool and the v block used to make the side set on the bottom, then finished with a piece of square stock in the same v block. 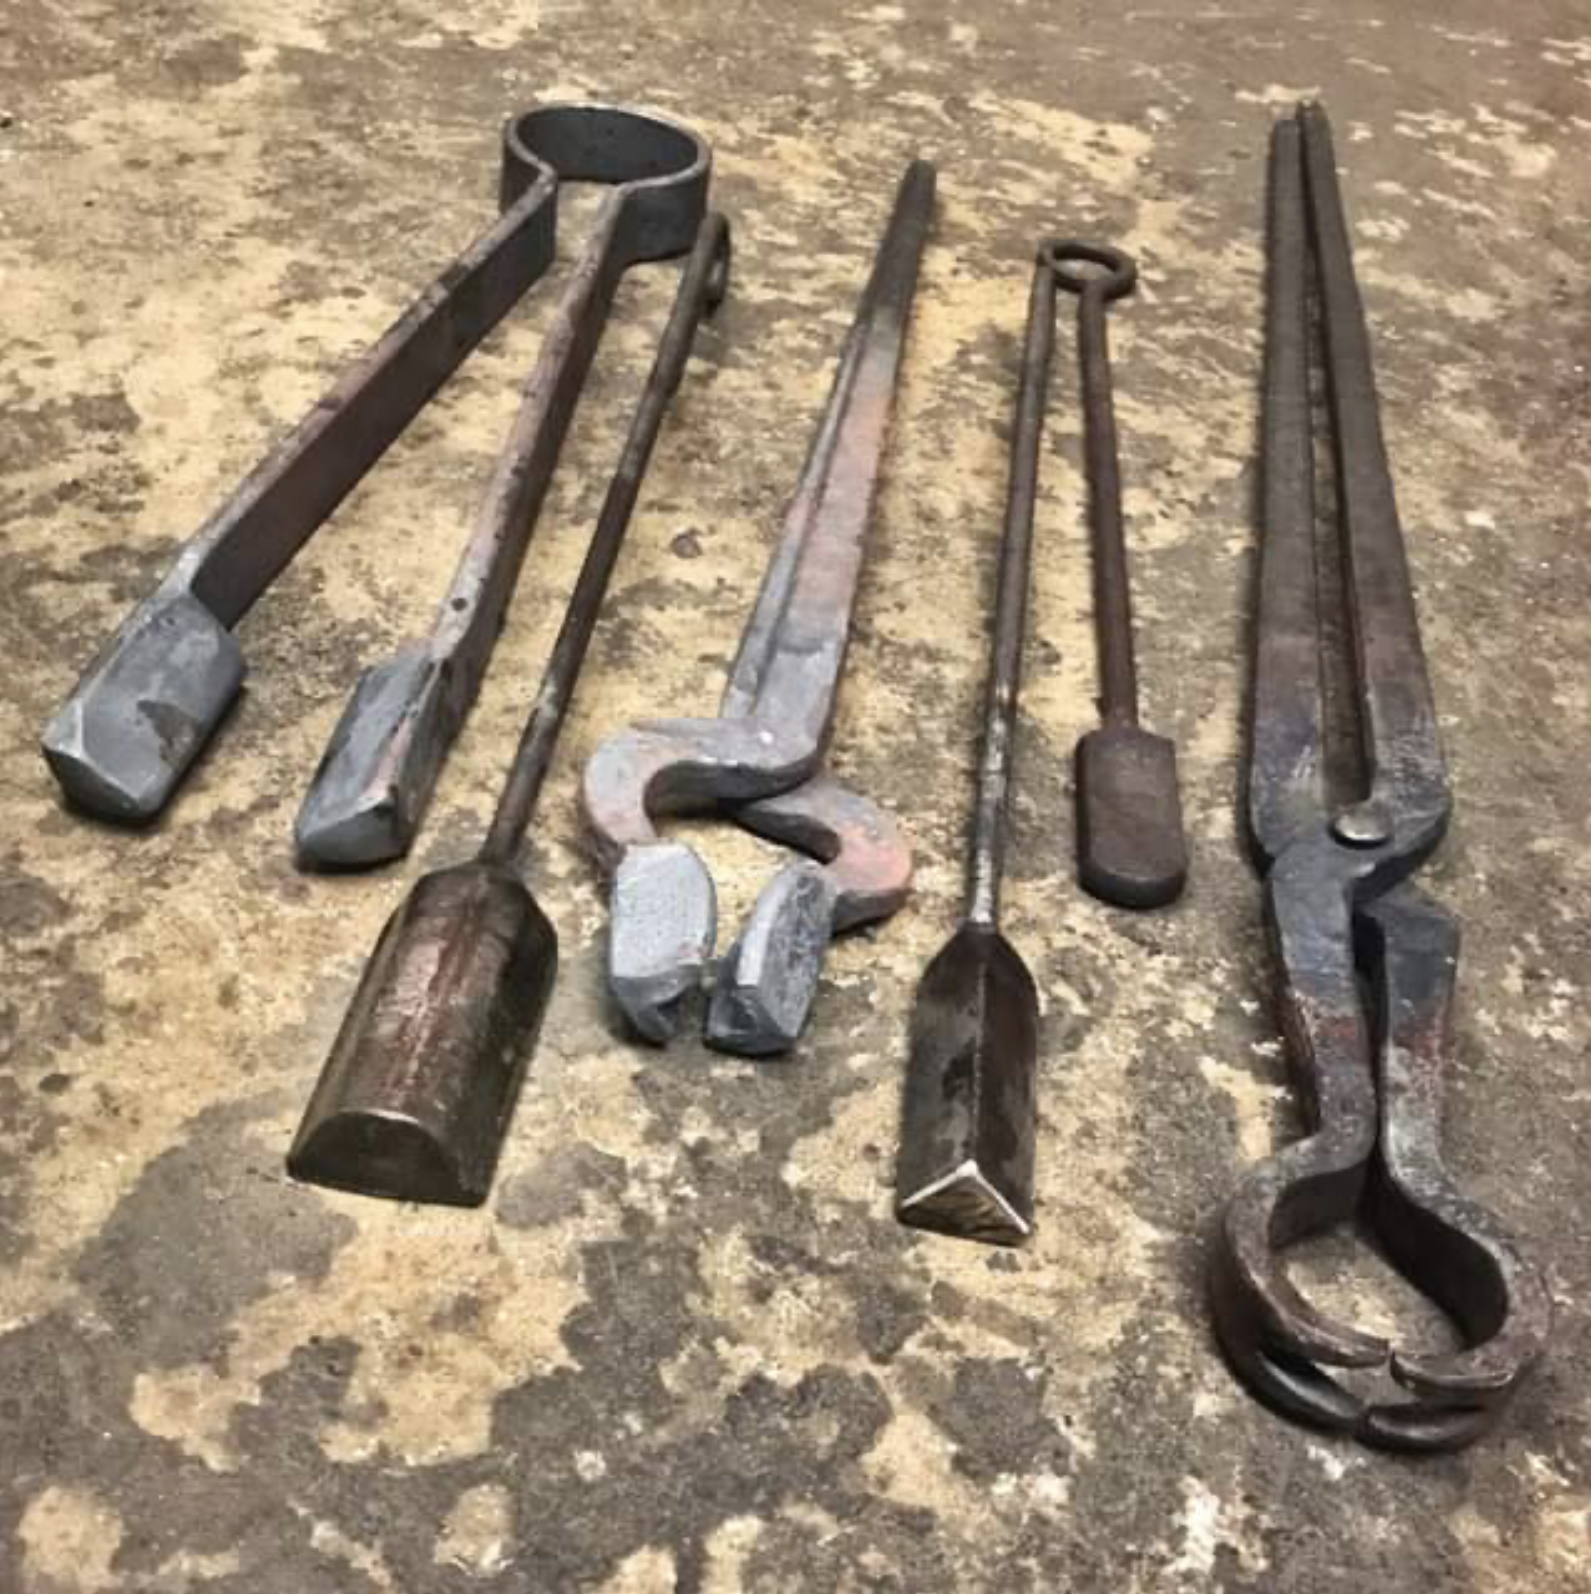
Some smiths make really nice bits by doing a little pre forging, and I do too on large ones, but don’t really find it necessary for things under about 1 1/4” square, as long as I’m careful to center the v tools and the stock in them. 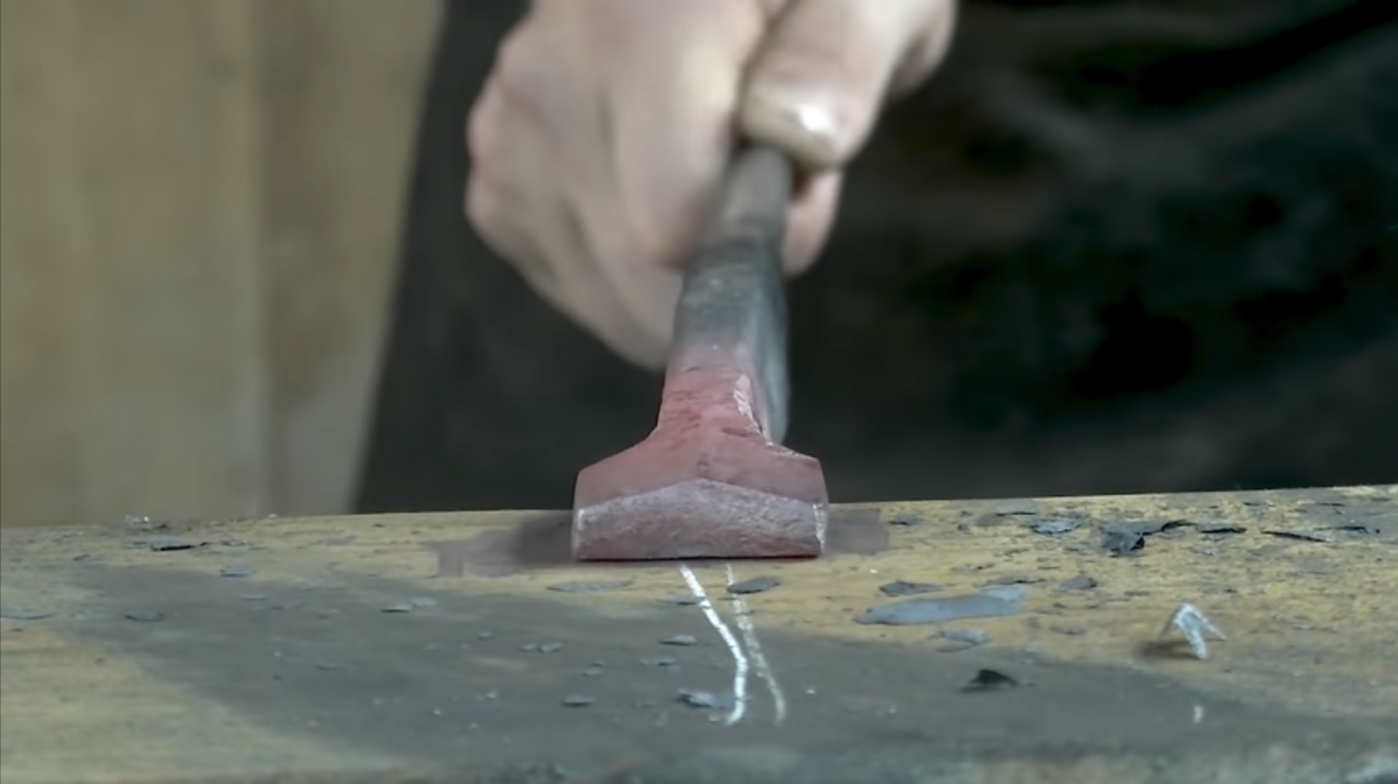
Or like this: 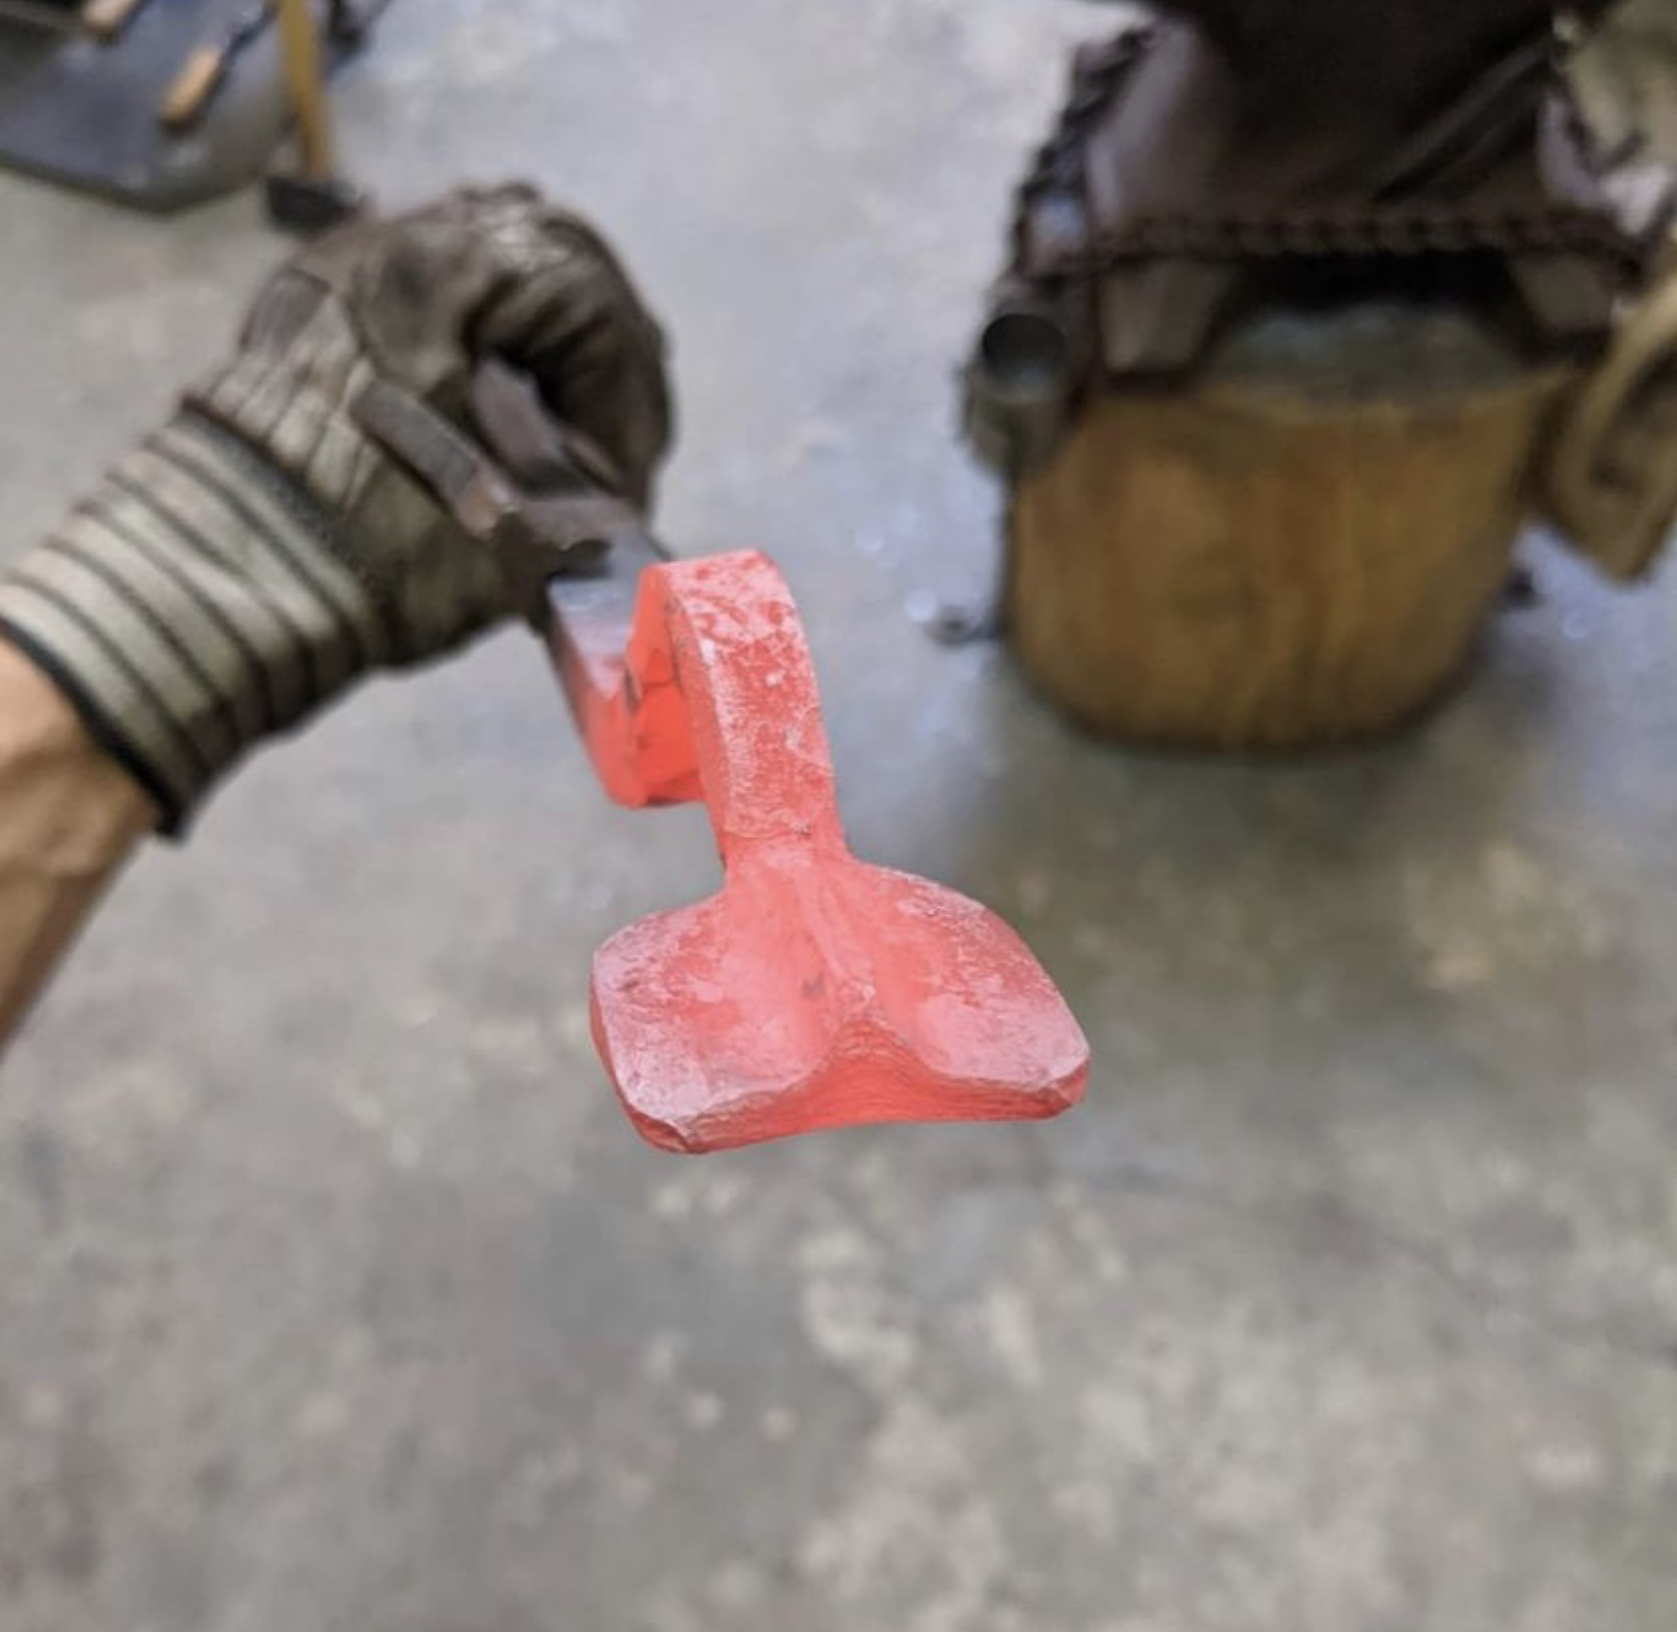
Make your tongs out of mild steel. There’s no reason to make them out of any alloy or high or even medium carbon steel. These are designed to stand up to abuse, and if you tweak them being rough or by a mistake, you’d heat them up, fix them, quench them, and get back to work. Quench any of those other materials and they’ll harden and fail, some materials will suffer failure due to work hardening. And they always fail at the worst time, dramatically.
On additional tooling: 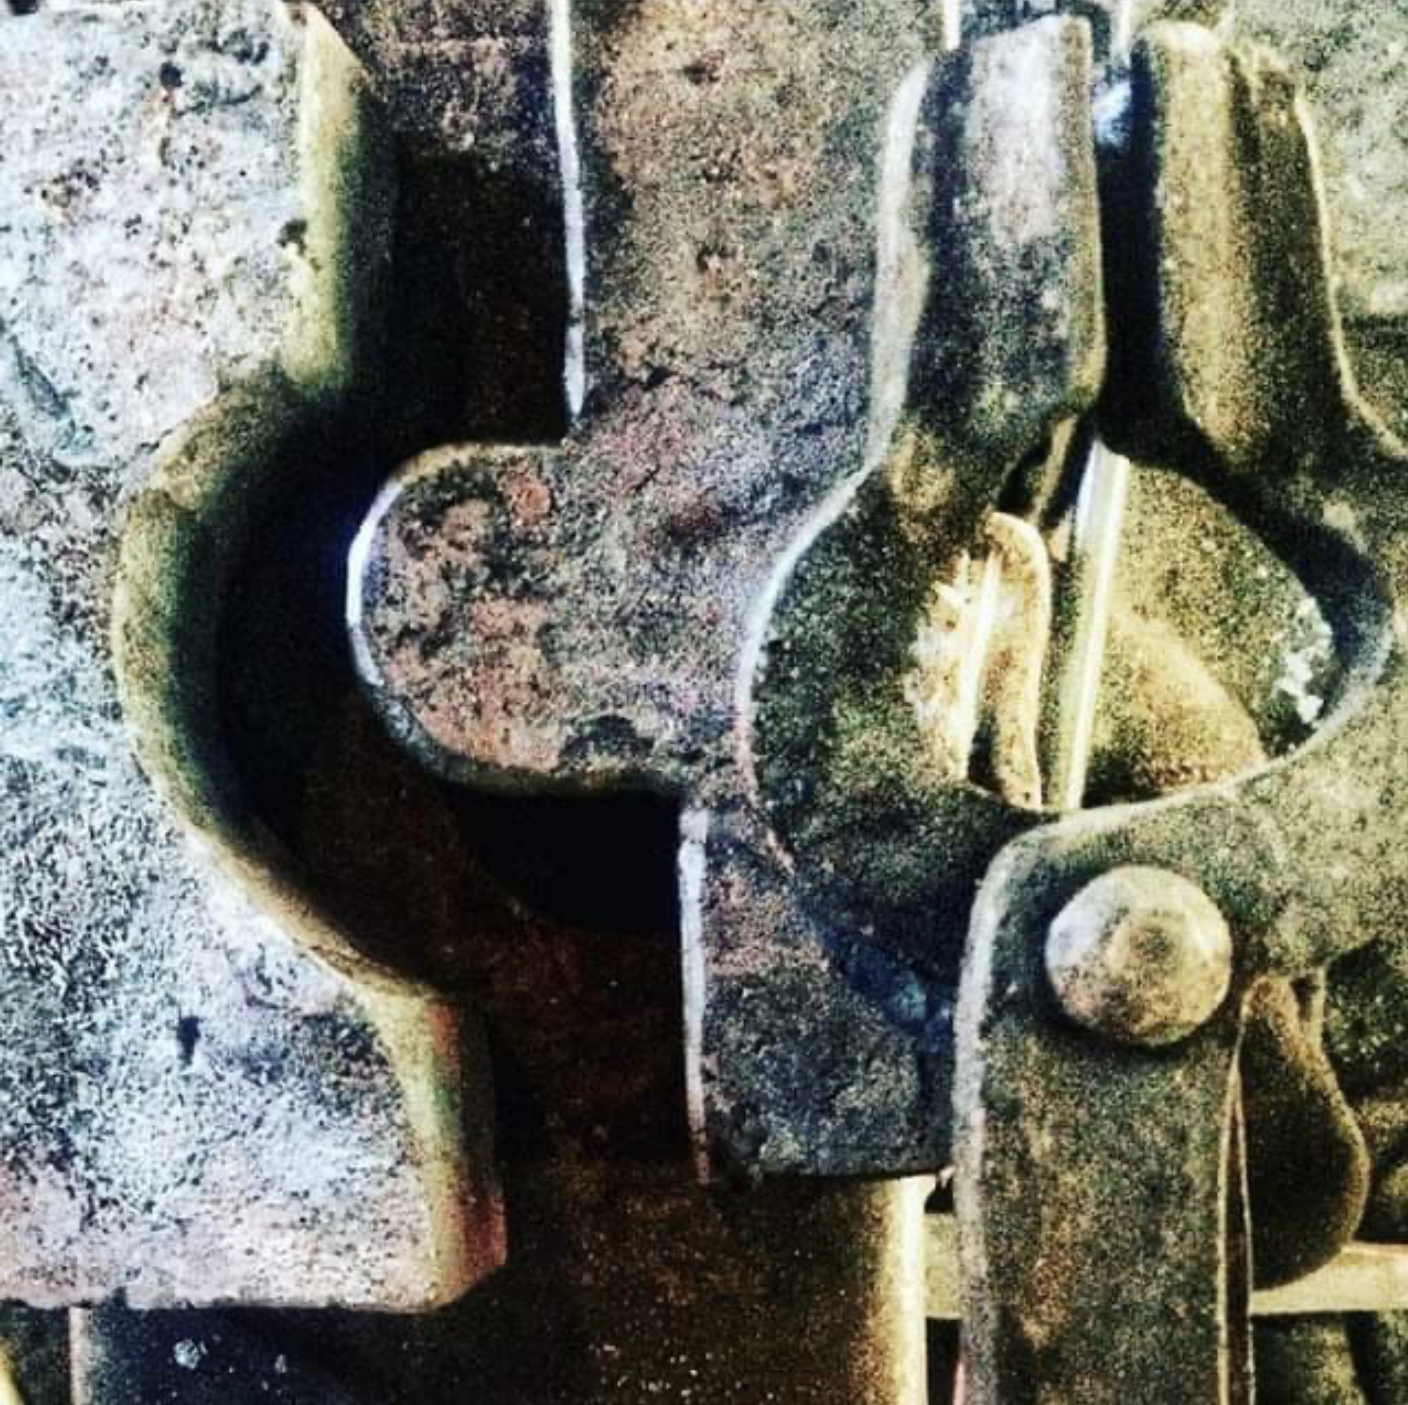
I forged those forming tools as a demo during a powerhammer class I was teaching, and the students used them to assist in the finishing of their tongs. None of the tongs I’ve shown you were made with a tool like that, but I do have a set of those for doing production tongs and forming the jaws on the press. The pre forging of the jaw shape is different when I’m doing that, so I can squish the jaw from straight to finished in one shot and don’t have to hammer on the thickness much, which would distort the jaw shape.
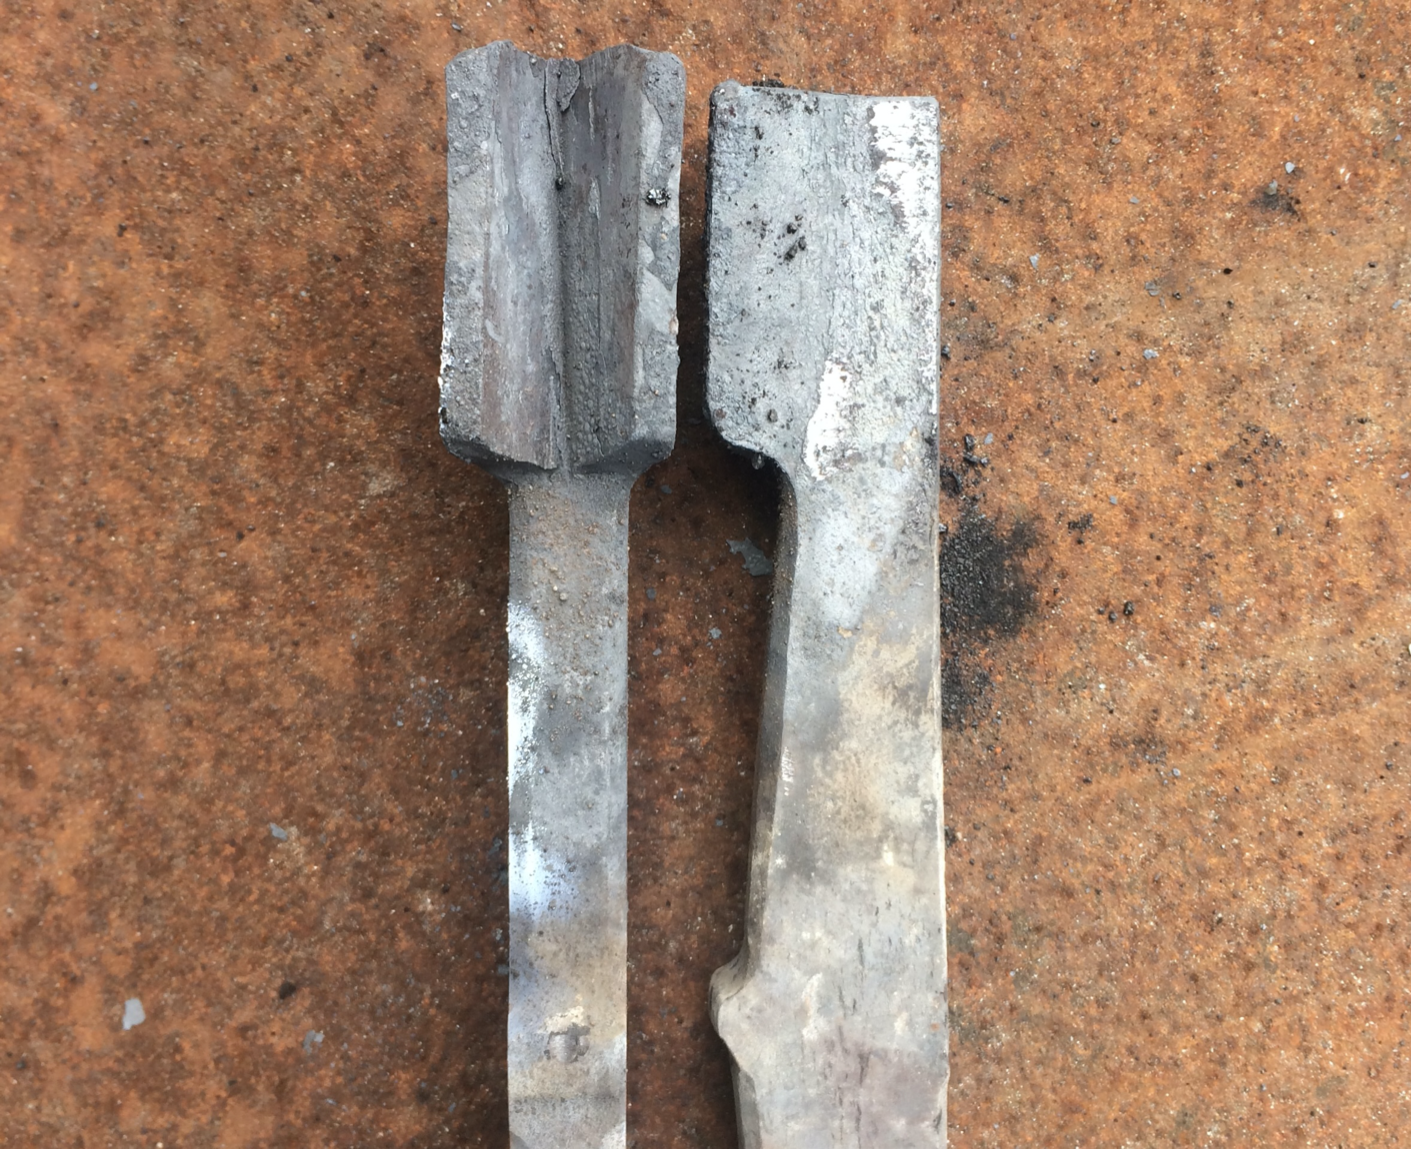
I go from something like this, 
To something like this, in one shot 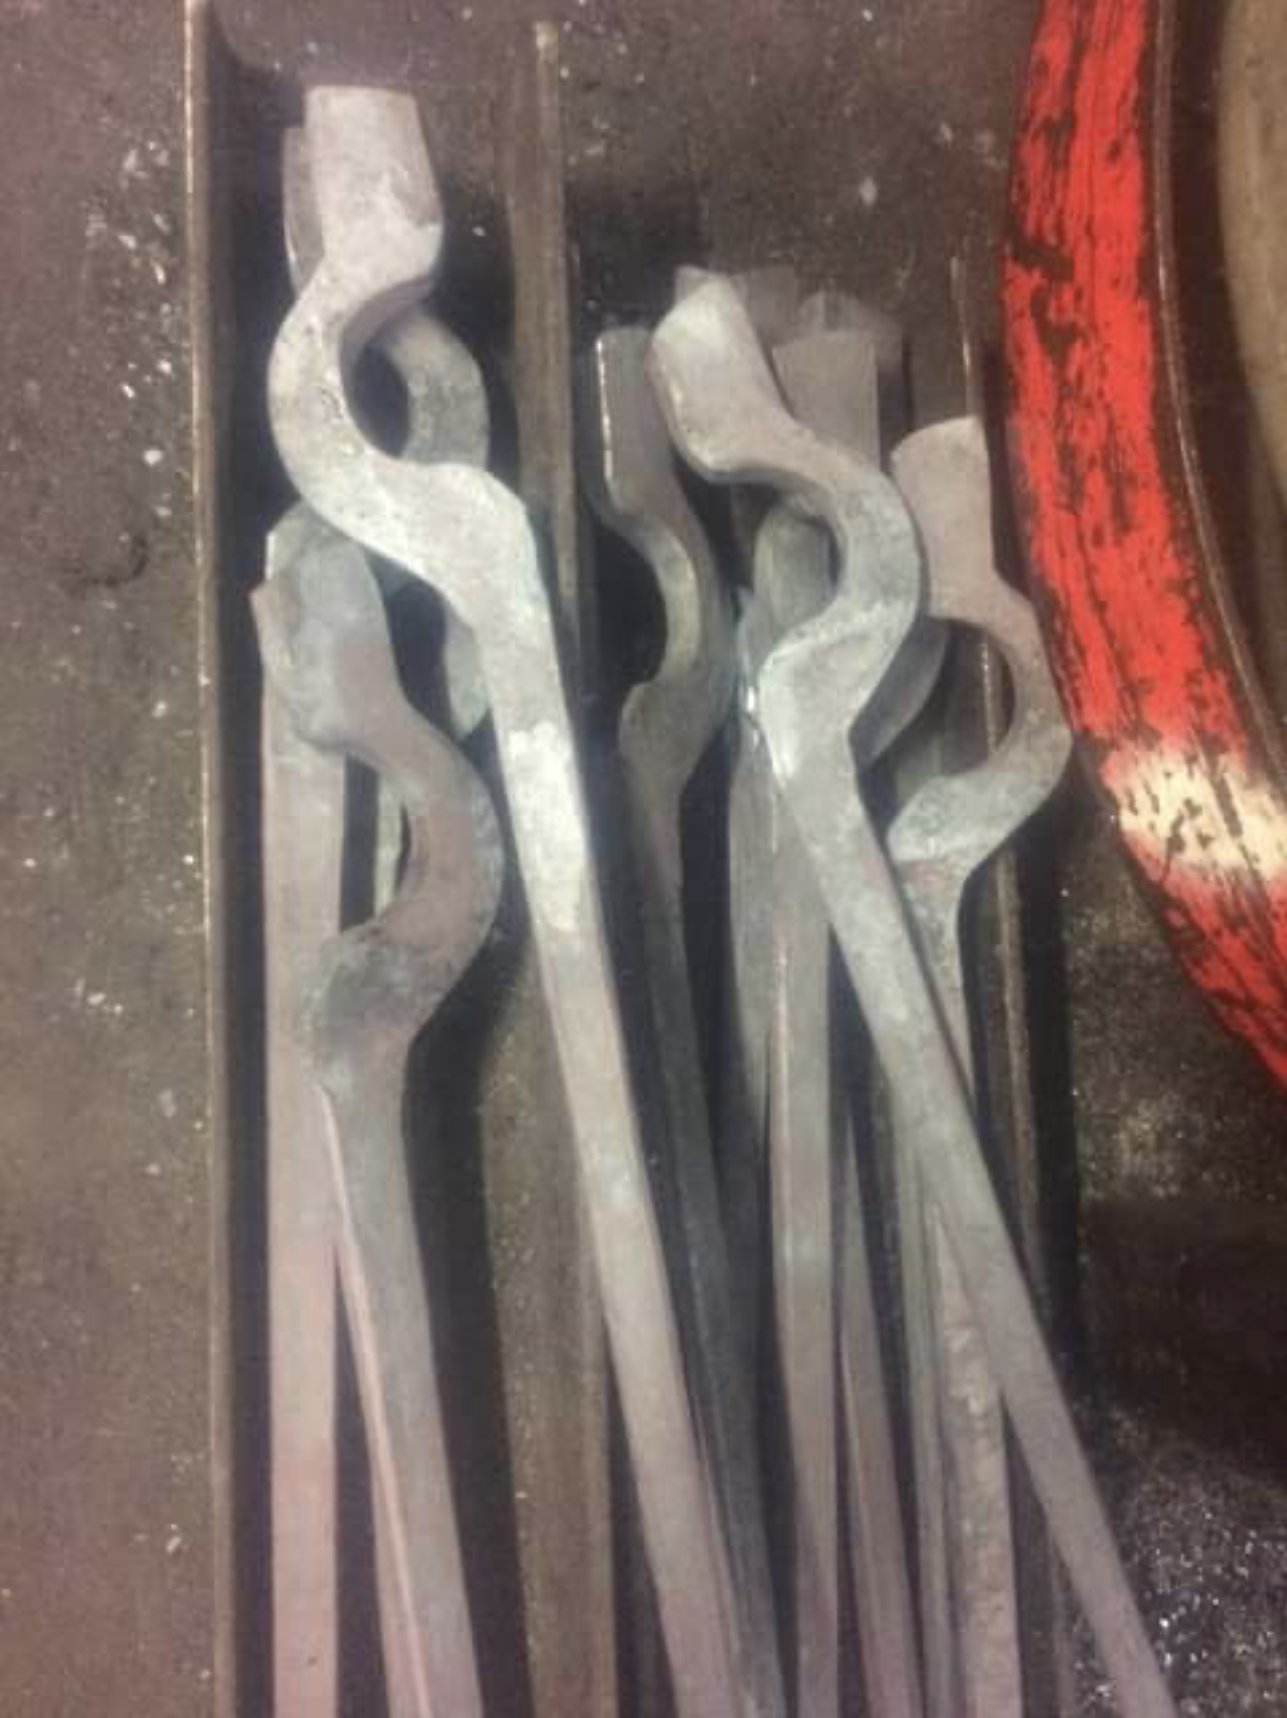
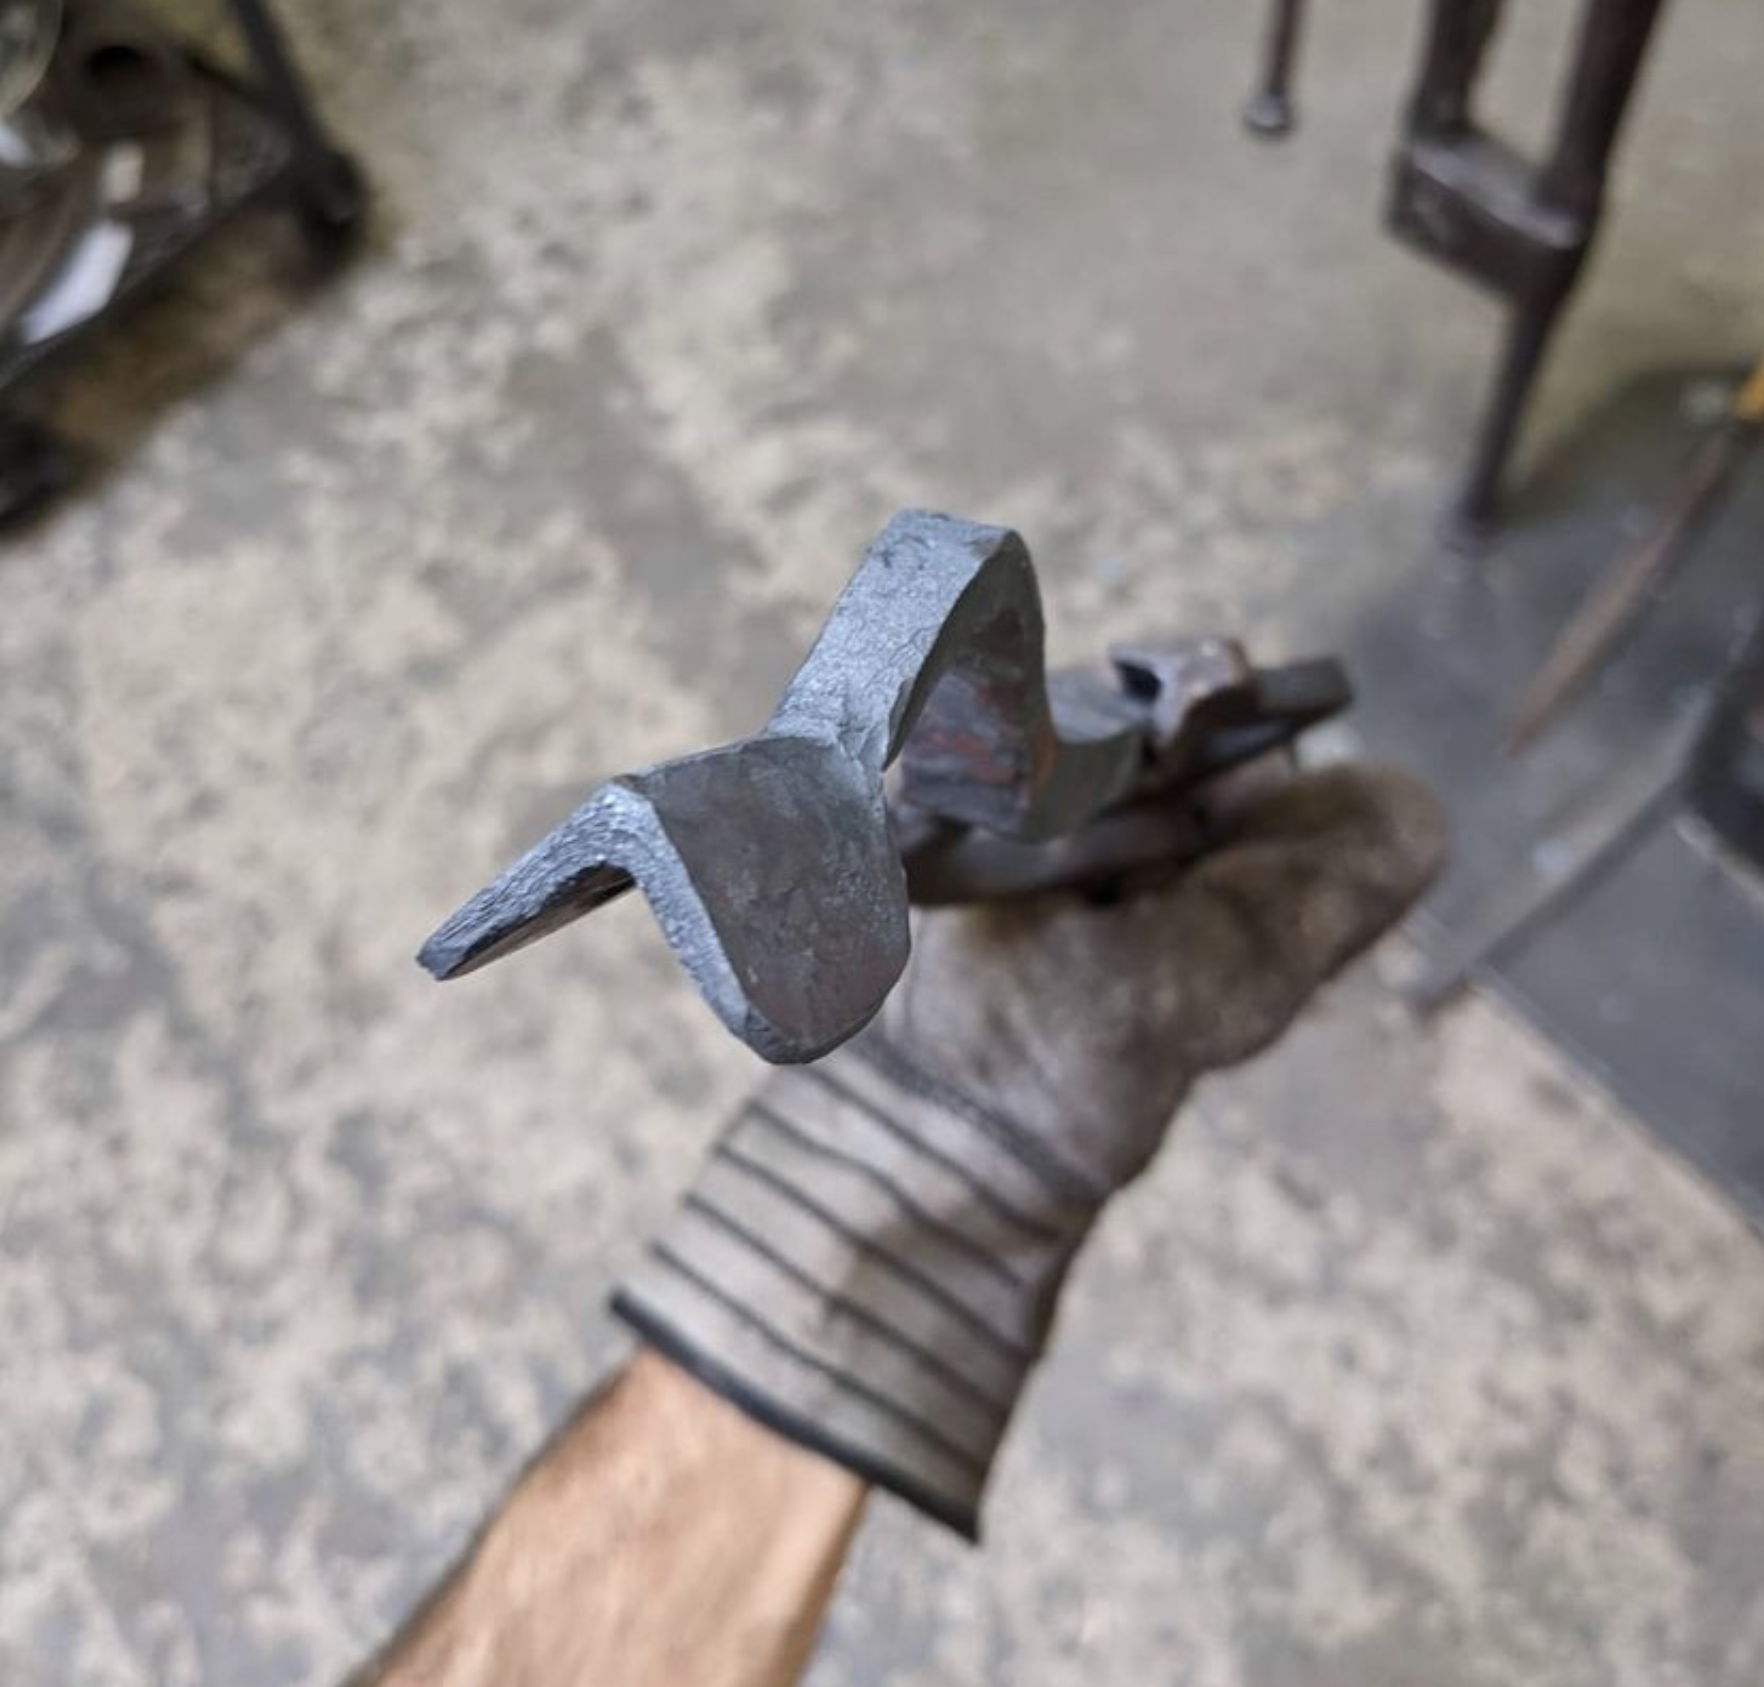
But the preform on the jaw looks like this instead of that straight taper 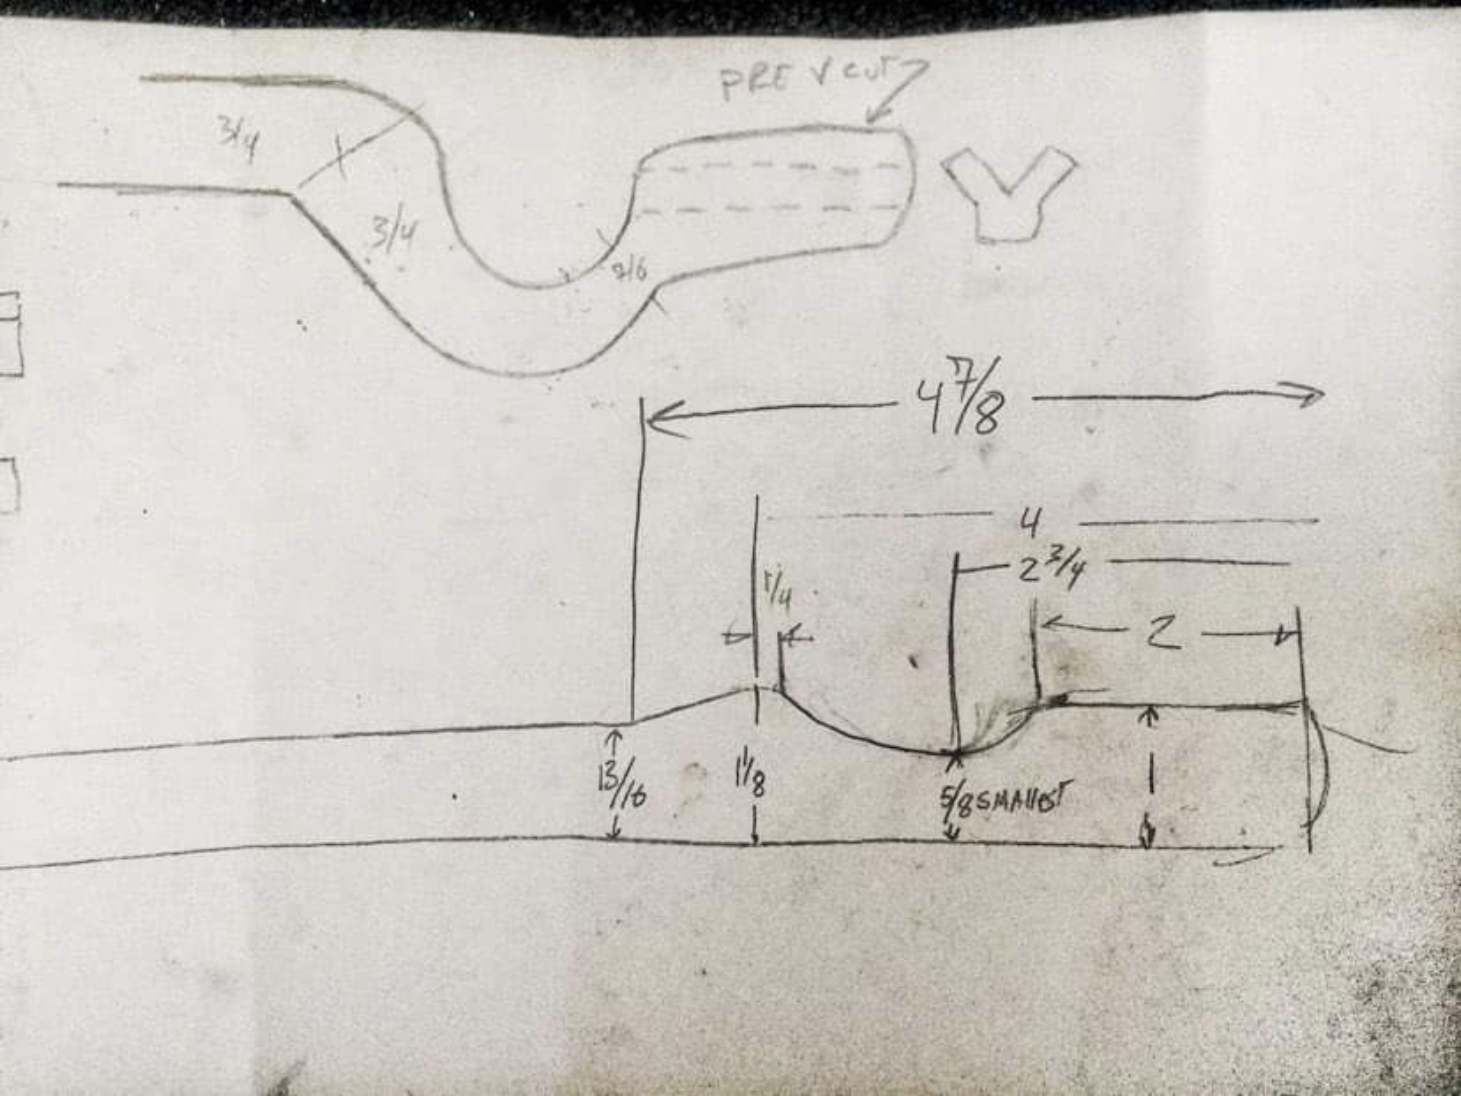
And can be made like this:
or this
But it’s not worth it if you’re just making tongs for yourself because you have to have different jaw shaping tool sets for every different size 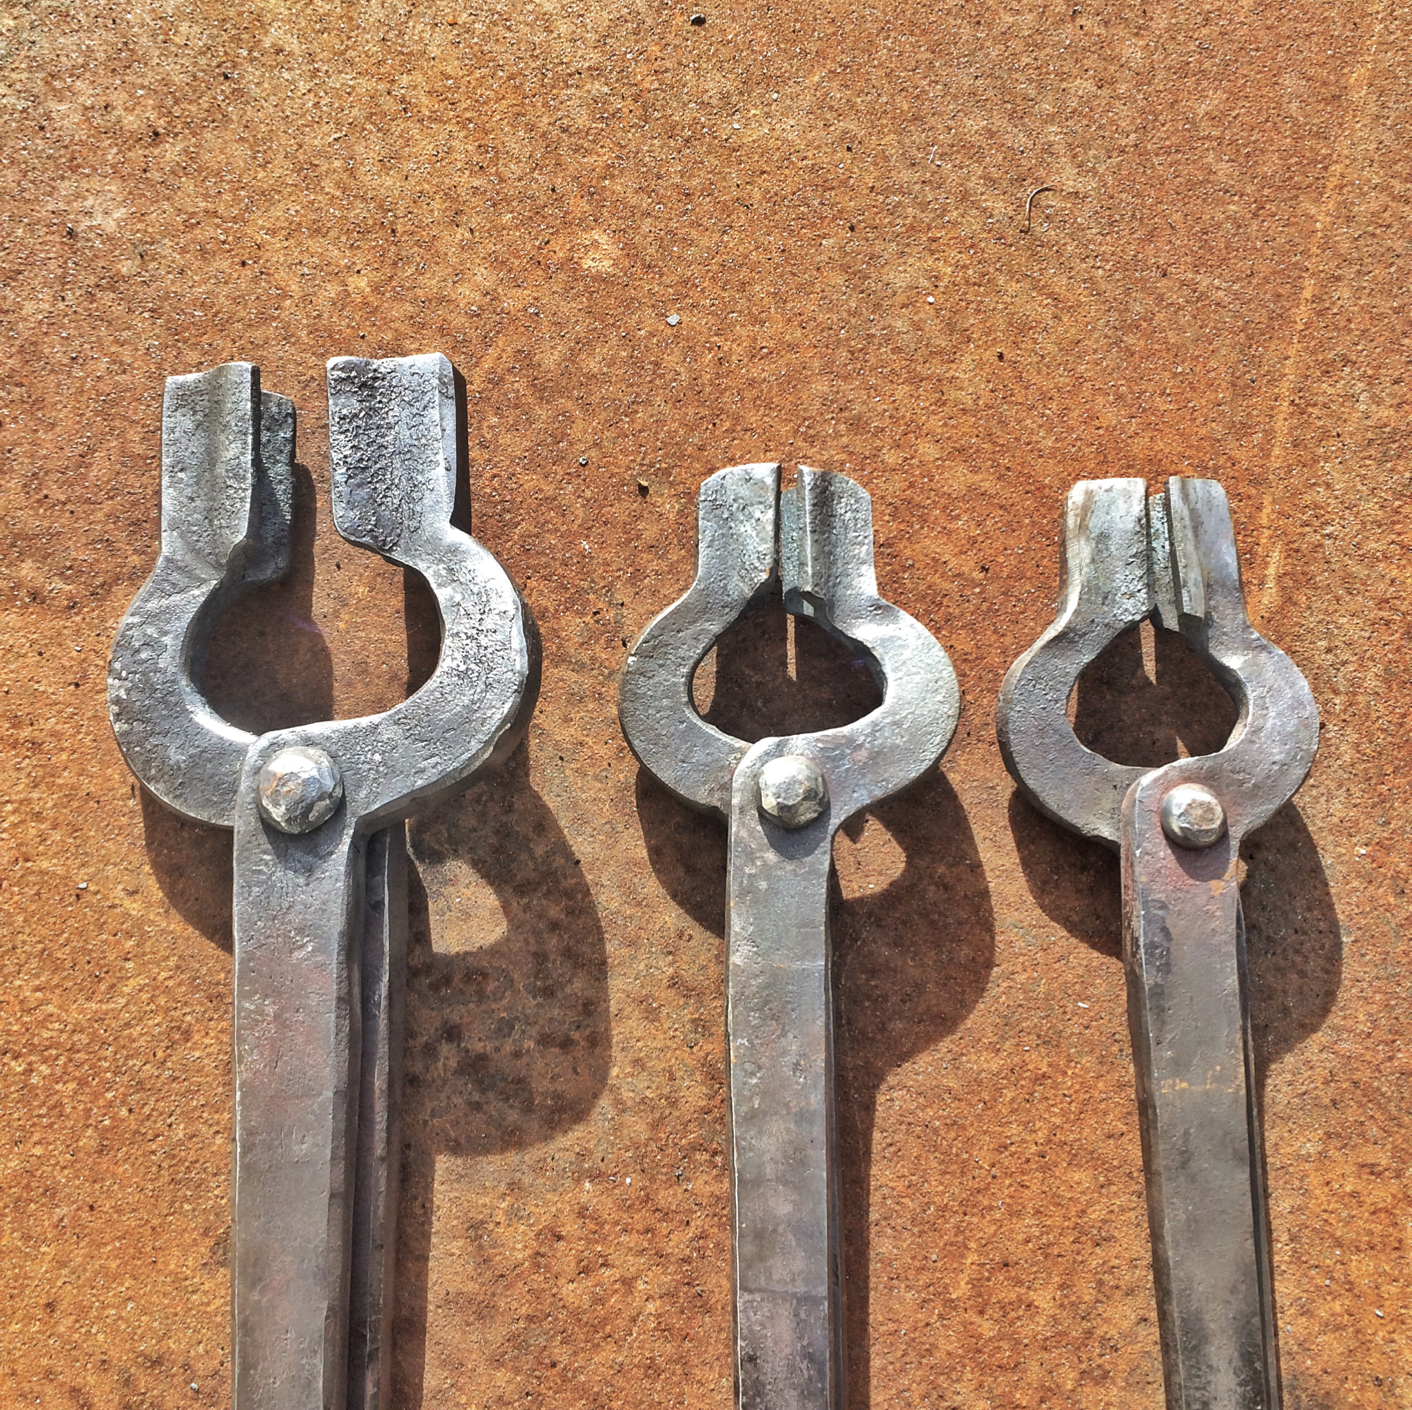
The only special tools required to make these tongs are the most common at the hammer, a side set, and a round back flatter. 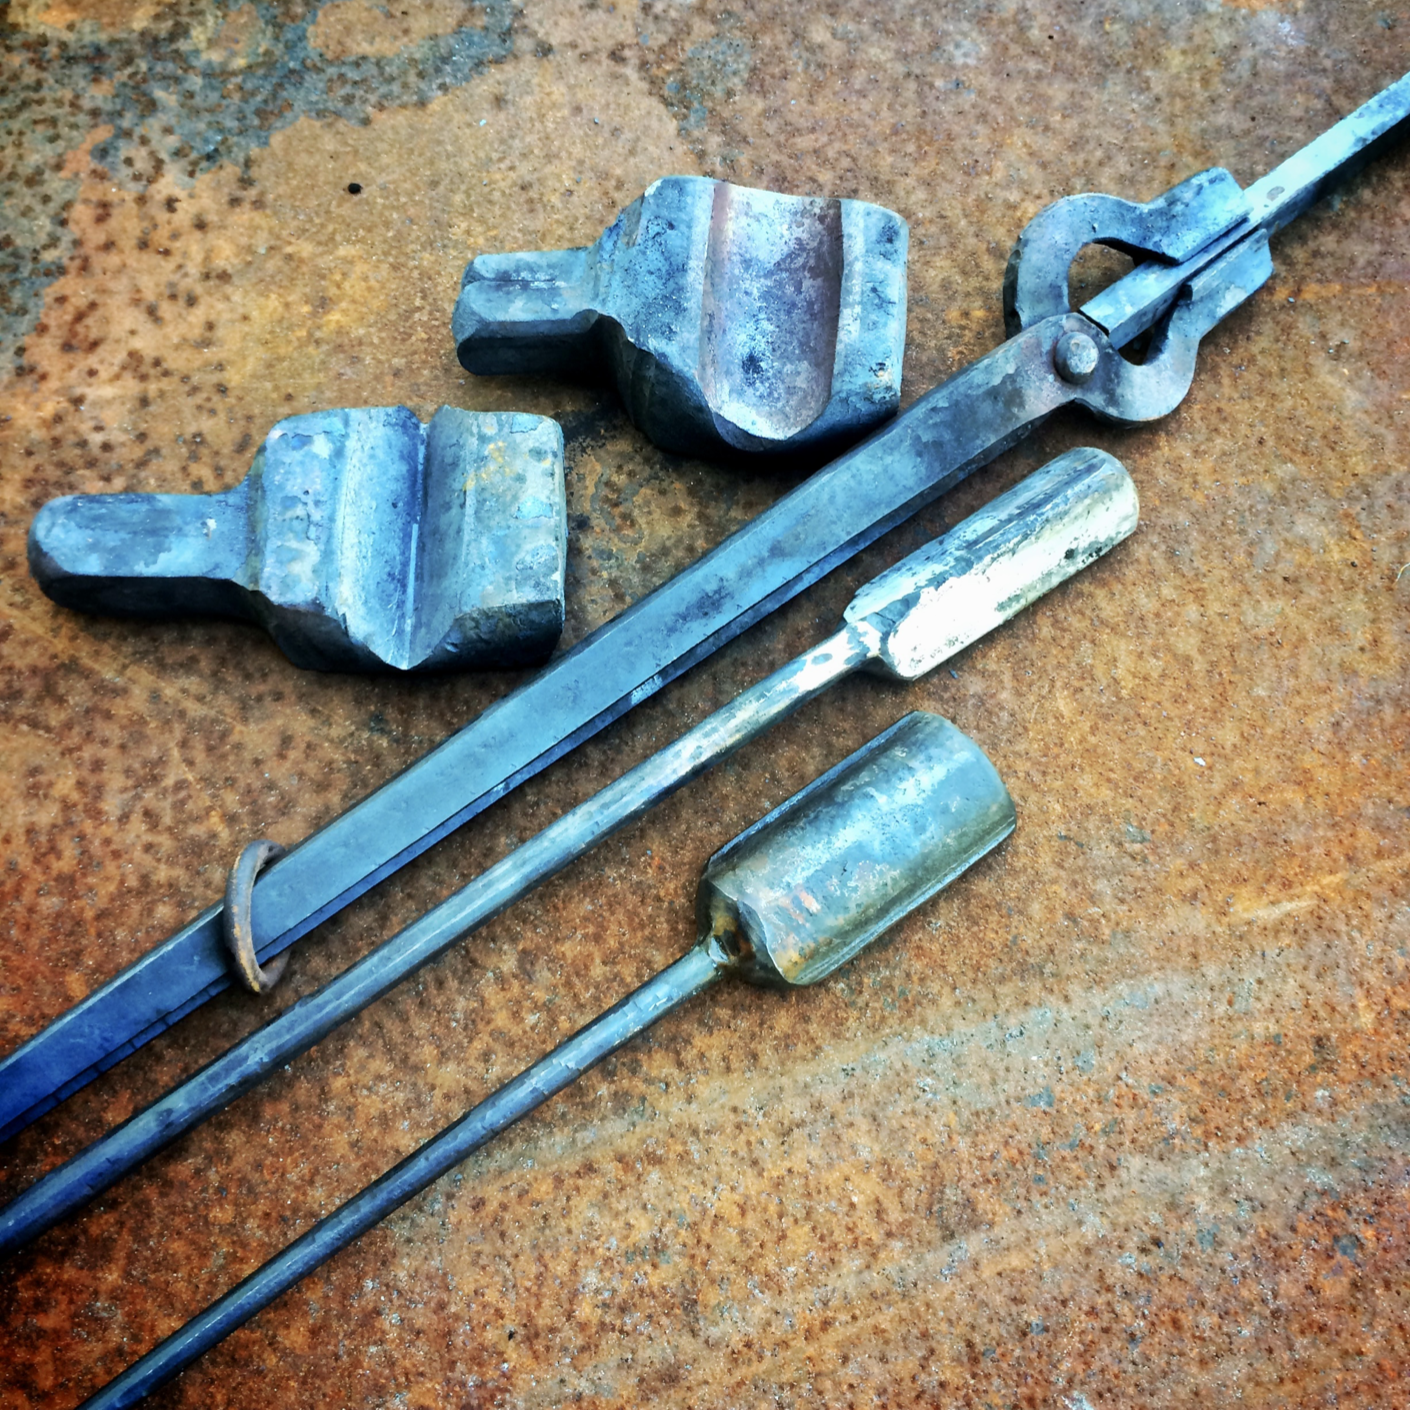
In order to make the side set, you need an acute v block. I start the side set by making the handle and forging the 76-78 degree included rhombus. Let that cool while heating a big chunk. Drive one of the sharp corners of the rhombus into the hot block. Keep an eye on it and make sure you get it in there straight, so it’s not leaning off to one side. There’s your acute v block for making side sets and tong bits. Now quench it and finish the side set in it. 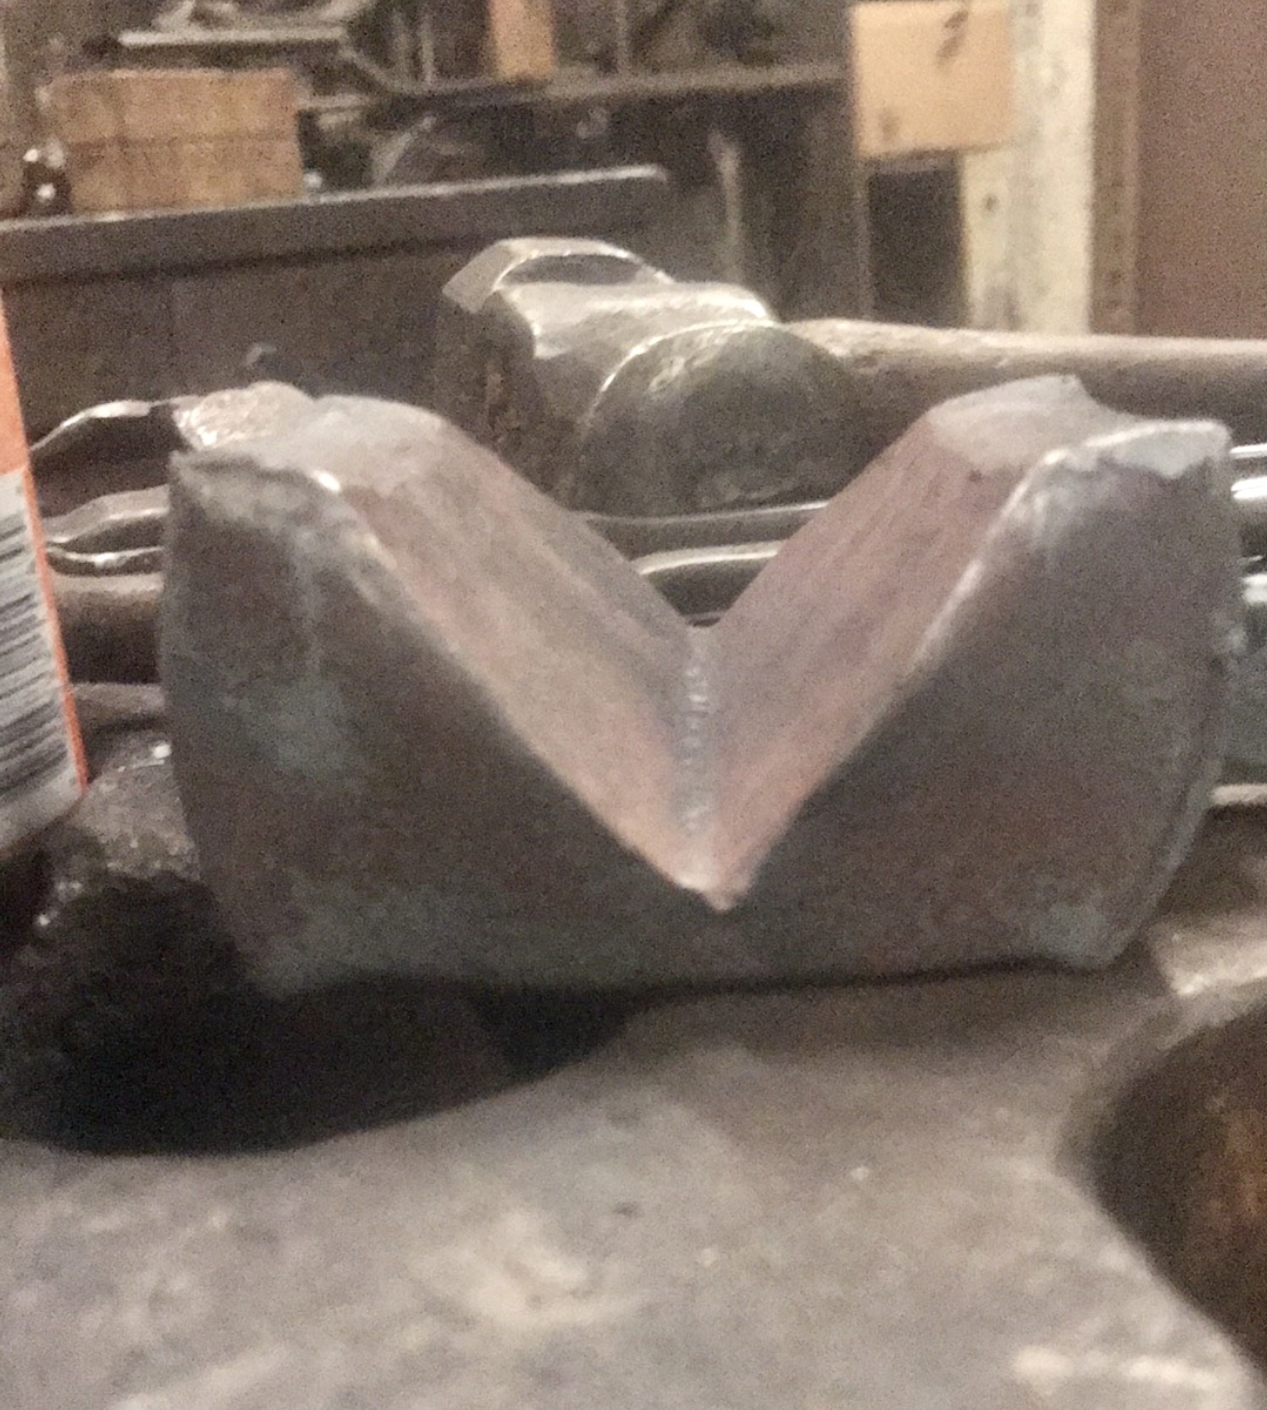
The same technique can be used to make the swedge for the round back flatter. Make it with the thing that’s going to be the flatter, then make the flatter in it.
Use this power only for good. 🙏 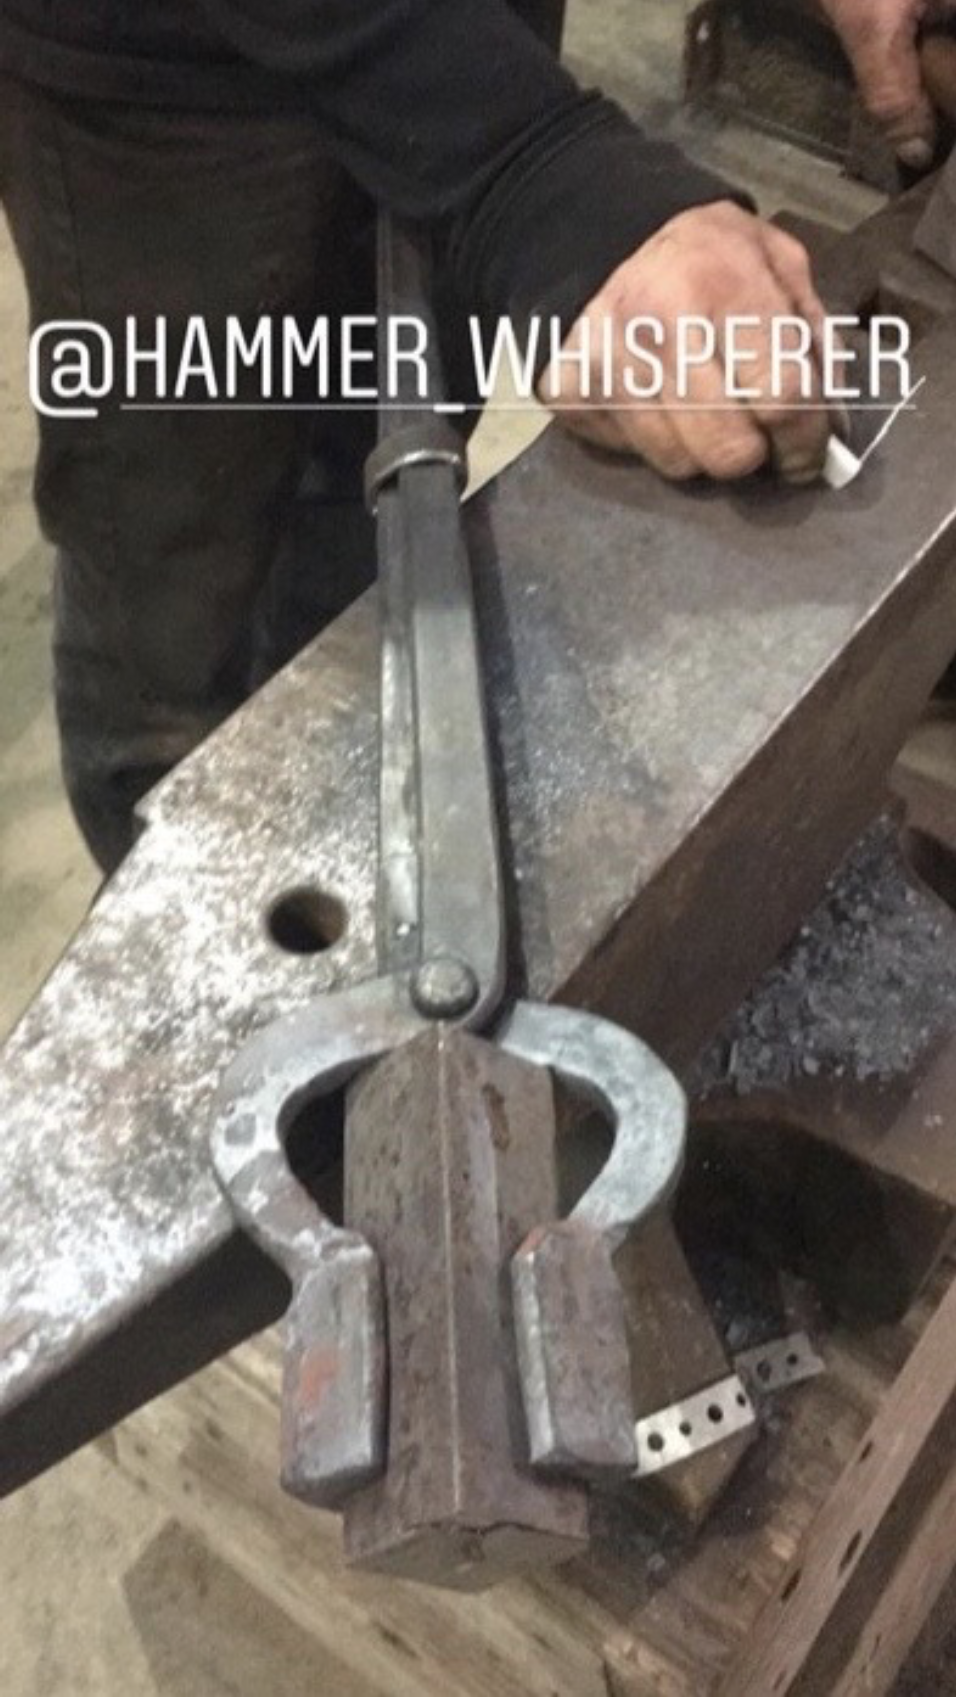
January 20, 2023
|
|